

Alyssa Dumire, Director of Children’s Education
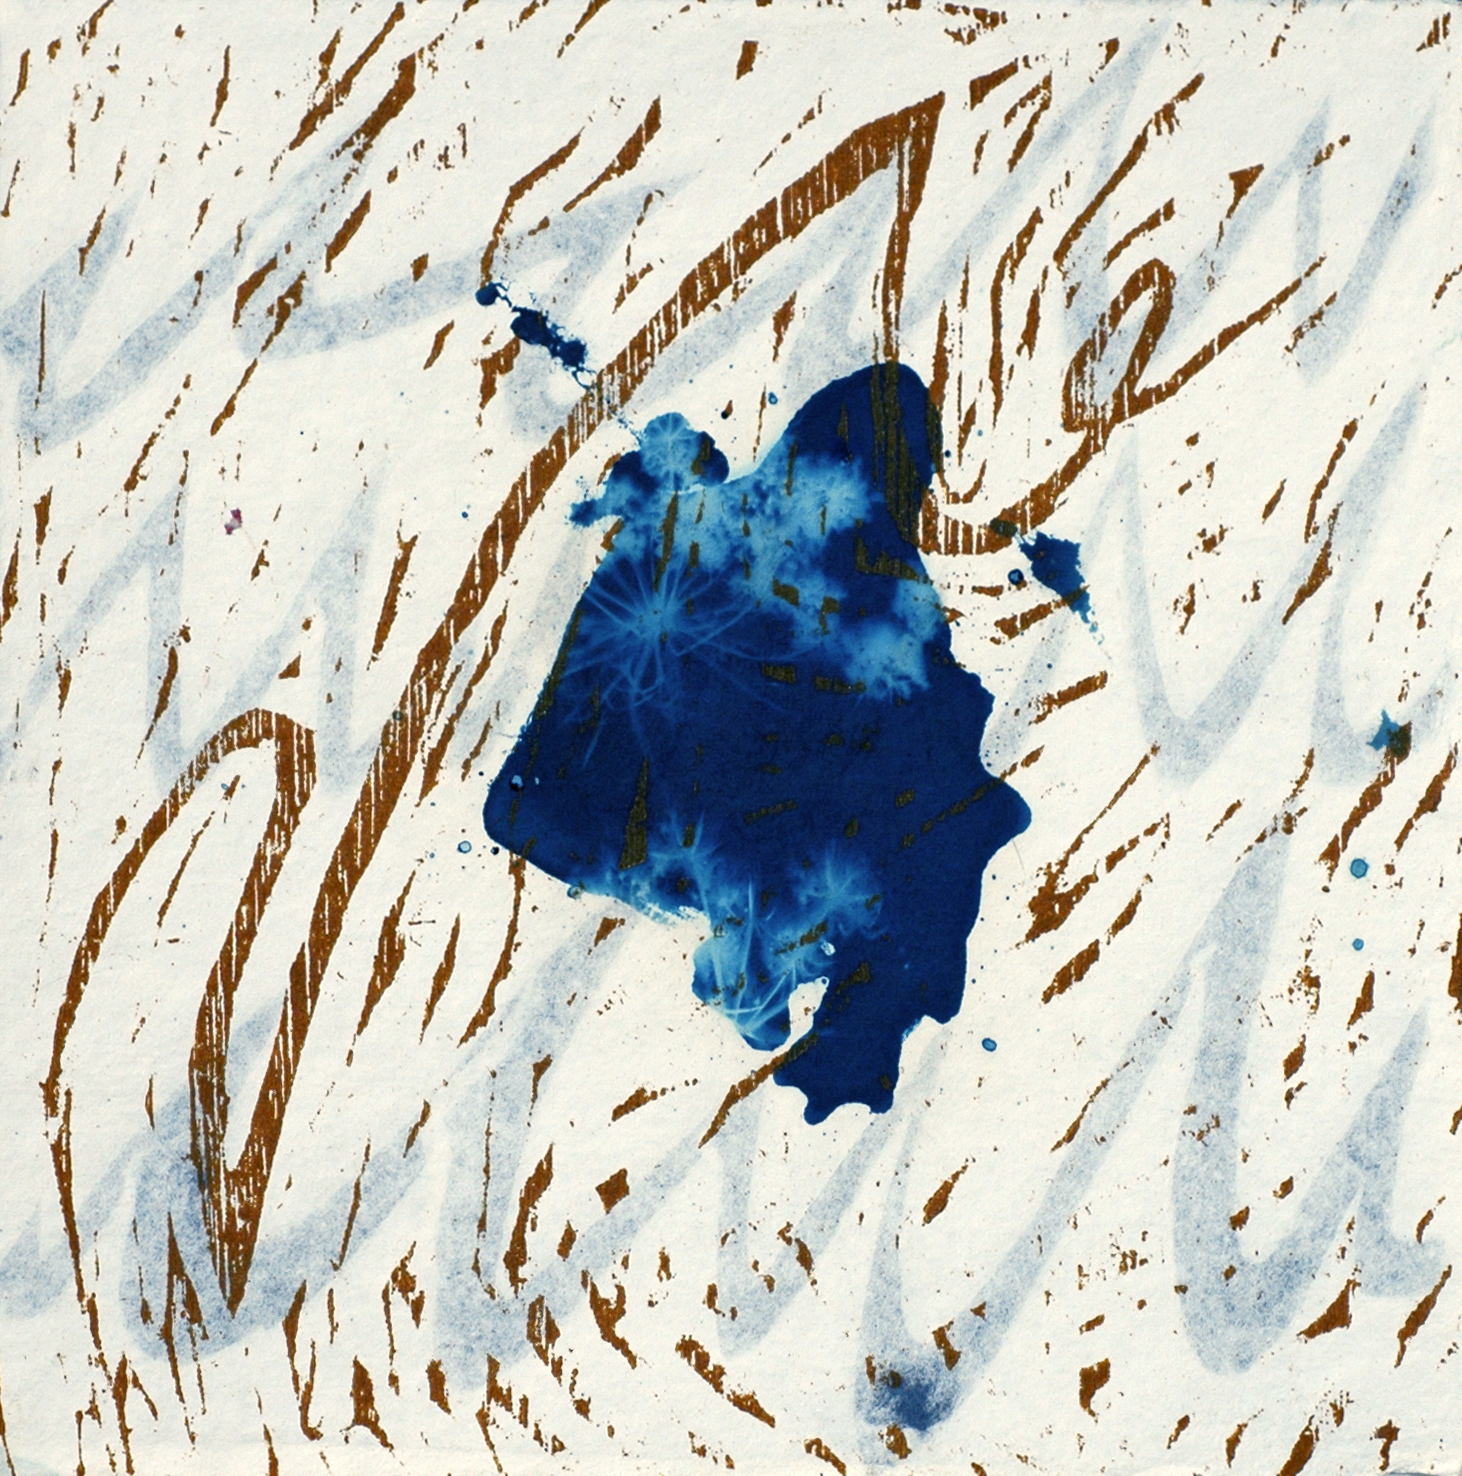
Andrea Peterson, featured previously on the blog in a “Treasures from the Vault“, focuses on the human relationship with nature in her work. In fact, her work is made sustainably from the materials around her. [Learn more about her reuse of materials in the blog post linked above]. With Earth Day earlier this week, we’re looking to her example to make our own recycled, nature-inspired artwork! Peterson is the “paper” side of Hook Pottery Paper in LaPorte, Indiana (her husband, Jon Hook, is the “pottery” side), making handmade paper using materials that range from farm waste to the plants in her own garden to old jeans! Her handmade paper is used in her work in the FWMoA collection, Spirit, pictured below.
It is easy to make your own paper from materials you have around the house! Peterson’s is much more refined than the simple, homemade variety we’re making today; traditional paper making processes require that the fibers be cooked, beaten, and macerated to a pulp! In the Studio, we’re making new paper from used paper that has already been through that process. Most commercial paper, like that in your printer, is made from wood pulp; it is not as strong as art paper made with cotton or other fibers, and it is less sustainable (trees take a long time to grow!). This makes it all the more important that we get as much use from it as possible.
Got some old drawings lying around? We sure do! Our visitors leave behind all sorts of artwork in the Learning Center, ranging from the drawings and mixed media works here we’ve featured on the blog to coloring pages with a single scribble. I hate throwing them away; but we simply can’t hang on to all of them, so I’m happy to give them new life (after, of course, scanning all of them for posterity). Round up your half-finished drawings, old receipts, and paper scraps of all kinds! We’ll recycle them into new paper and make a simple print inspired by nature and Andrea Peterson’s work.

Here’s what you need to make your paper:
- Paper scraps
- Leaves and/or flowers (optional)
- Bucket or large bowl
- Blender (a regular, pitcher blender, a stick blender, or even a food processor should work)
- Mould and deckle: this is the screen and frame used to shape the paper pulp. You can purchase one or make your own using an old picture frame and some window screen, a splatter screen from your kitchen, or even a sieve to make a paper bowl! You can also make paper without one, directly on a tray or baking sheet.
- Towels
- Rolling pin or brayer
- Cooling or drying rack (optional)

First, prepare your paper. Tear or cut it into small pieces, about an inch on their longest side, and place the pieces in your bucket or bowl. If you have a paper shredder, that will make quick work of this step, but it’s fun to tear by hand. I tore up about 25 pieces of paper to make 4 (quite thick) sheets of recycled paper.

Add enough water to the bowl or bucket that the scraps of paper are submerged. Push them down with your hands to make sure they’re all in the water. I used white paper for this stage, but many of the drawings were done with tempera paint sticks and since these are washable, you can see how the color started to bleed right away. What color do you think the finished paper will be?
Soak the paper for at least a couple hours and up to overnight. It should feel very mushy and squishy.


Now blend it into a pulp! If you’re using a regular blender, transfer only a couple handfuls of the soaked paper at a time to the pitcher. I used an immersion blender and liked that I could control the size of the paper pieces. Blend until you have a mostly smooth paper pulp, adding more water if needed, then add any mix-ins. I added some dried flowers and leaves and, to some of the pulp, some scraps of colored construction paper. Blend again until you like the size of your mix-ins.
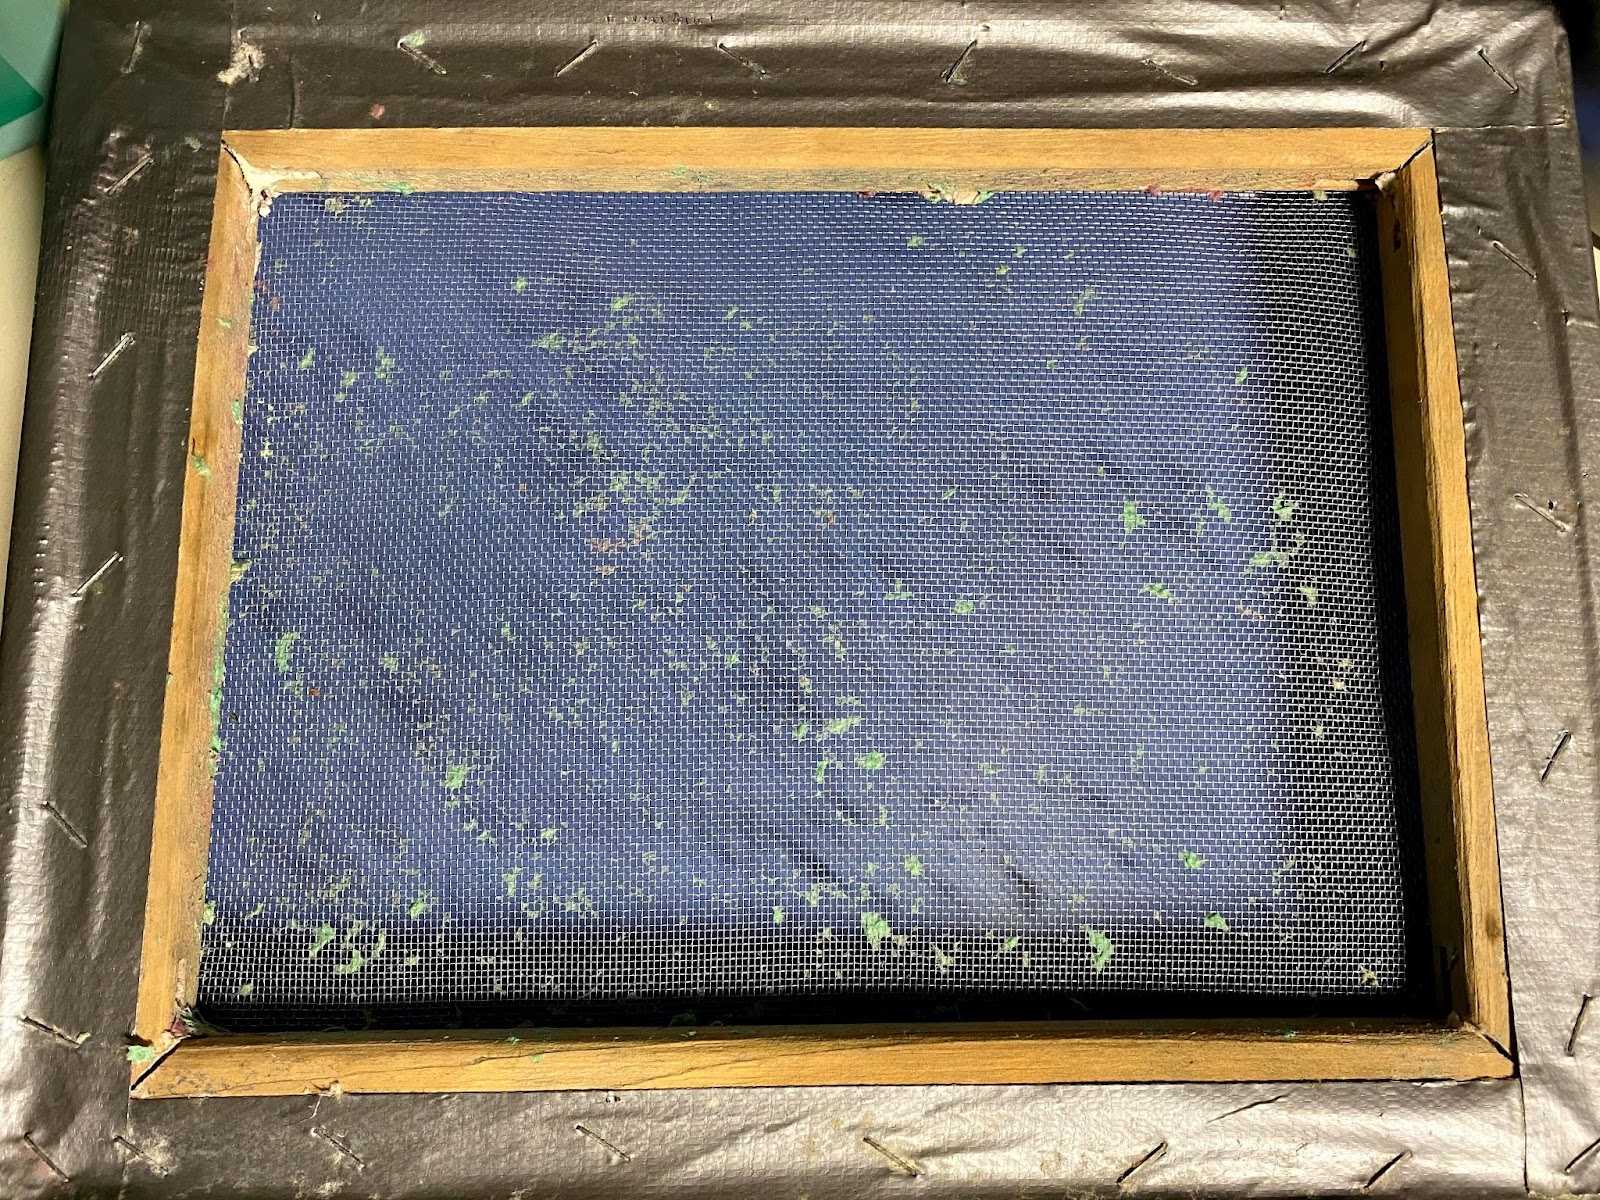
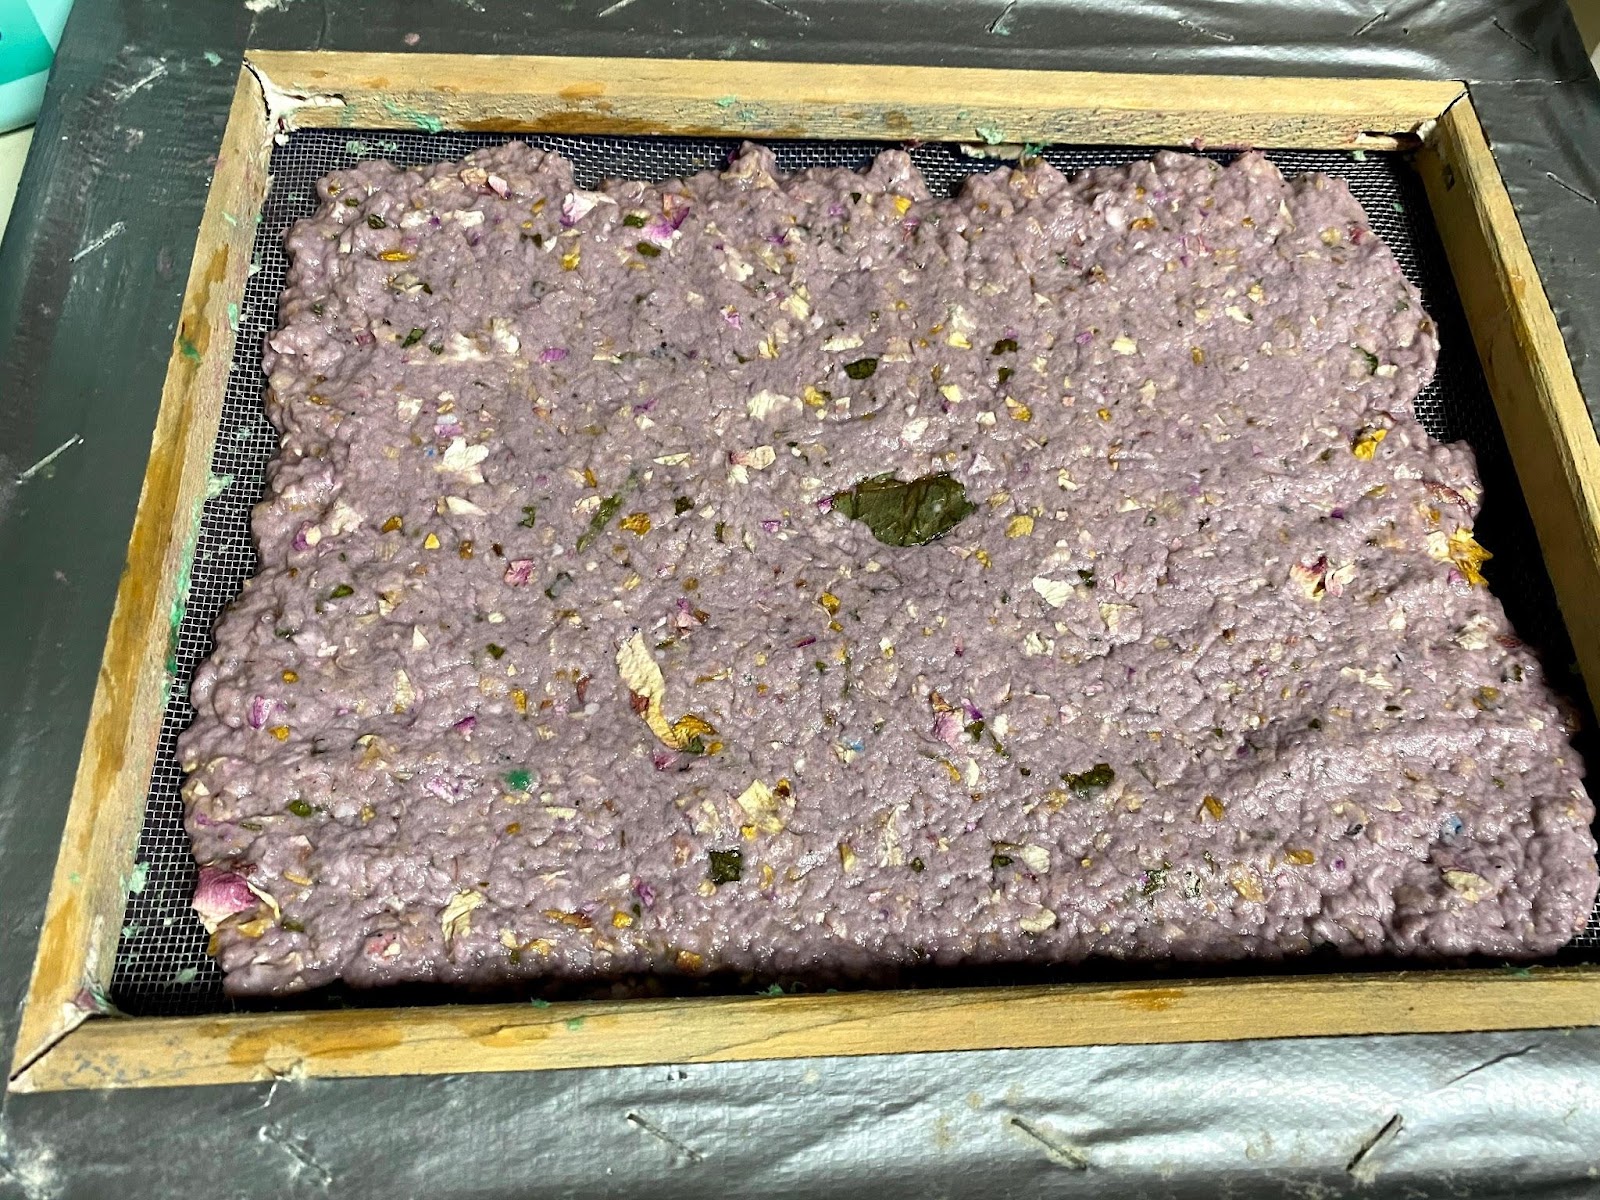
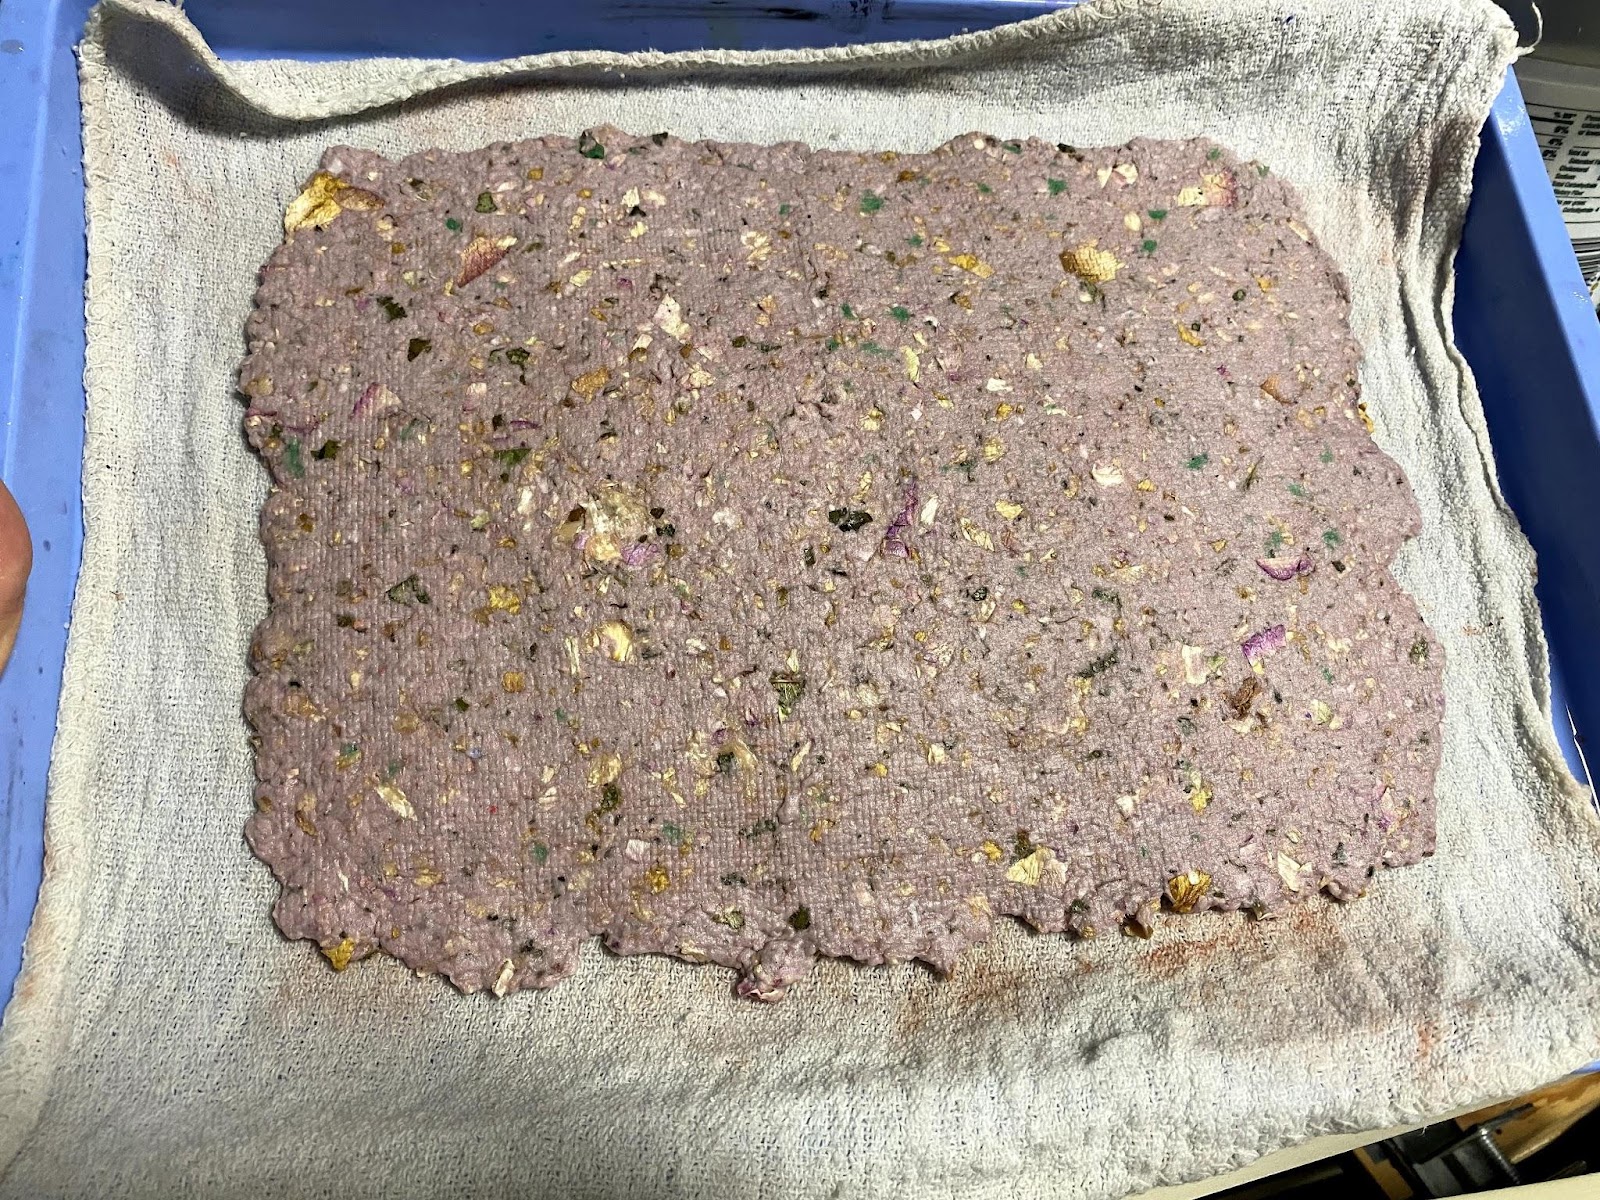
Now, place your mould and deckle (or frame with window screen), if using, over a tray or in the sink and scoop or pour some of the paper pulp onto the screen. Spread and shake it into an even layer, making sure to fill in any holes. If you are using a mould (the second frame on top of the screen–the deckle), fill it all the way to the edges to get a uniform rectangular shape, otherwise you can shape the pulp however you like! If you’re not using a screen at all, form your paper directly on a tray or baking sheet.
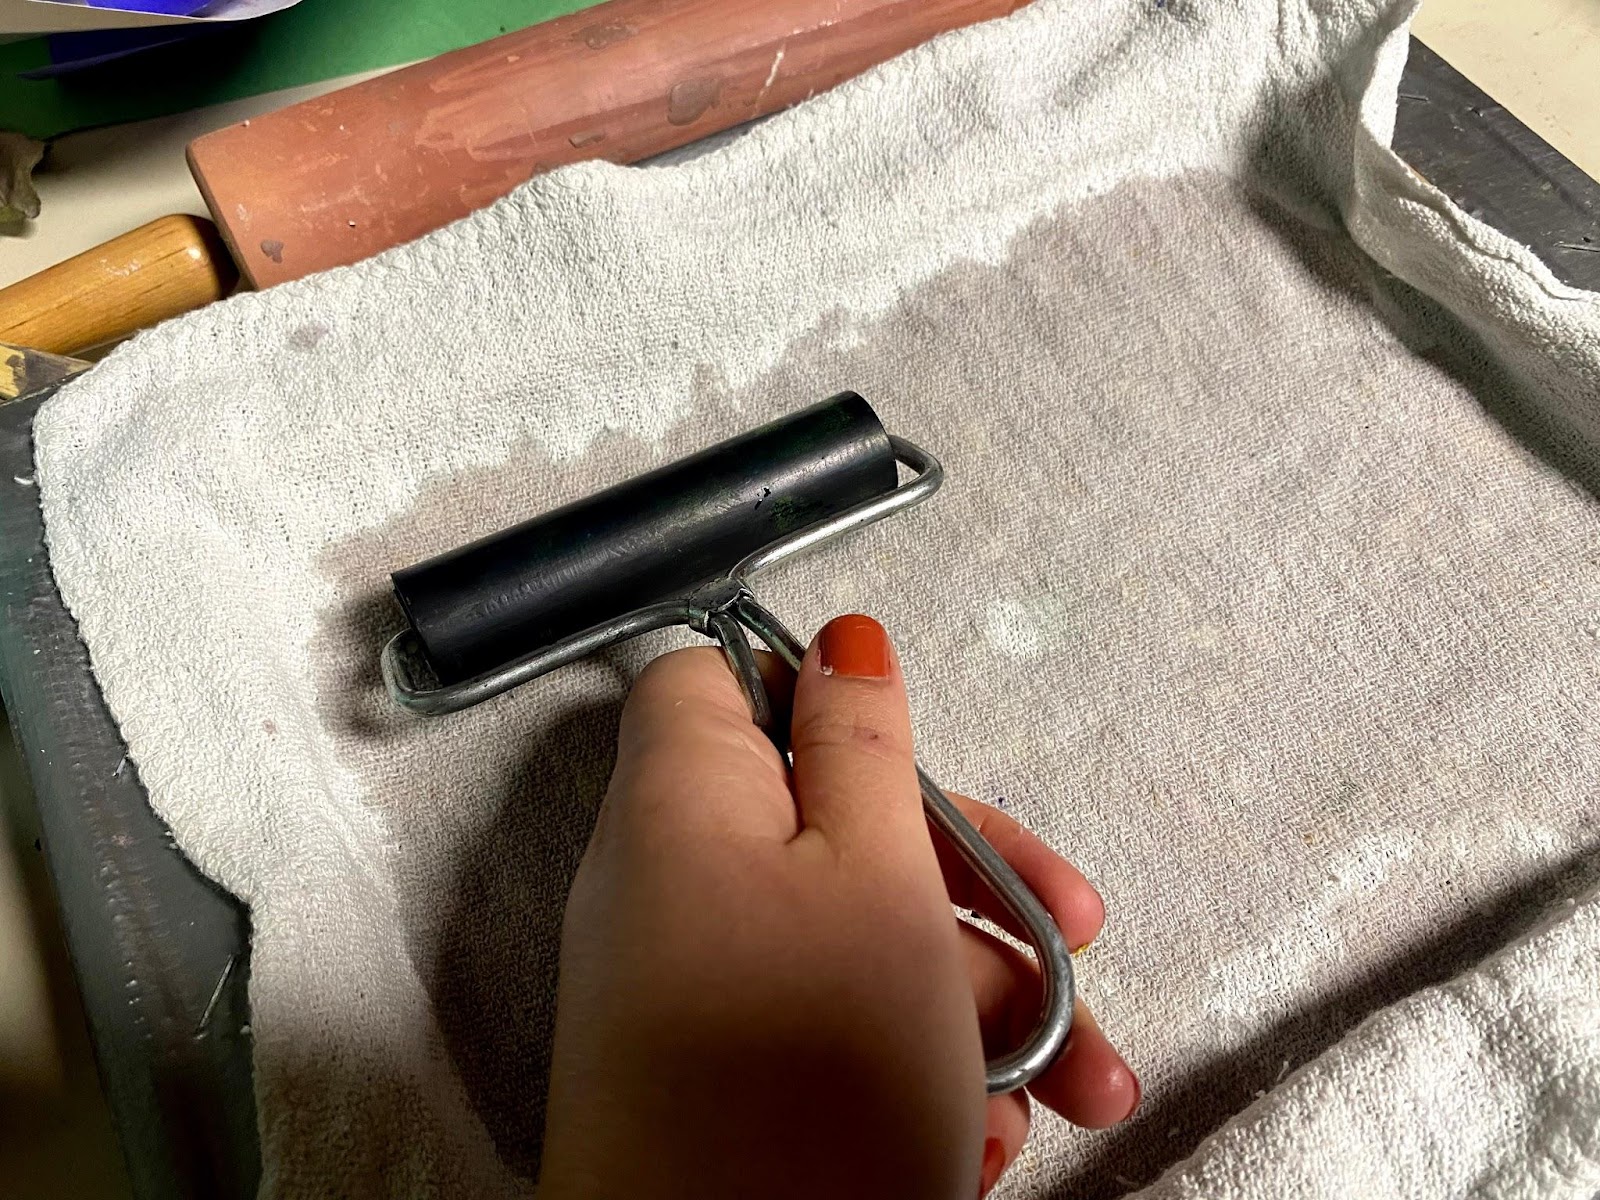
Remove the mould (if using) and place a towel over the paper, then roll over it with the rolling pin or brayer to begin squeezing some of the moisture out. The more you roll, the smoother your finished paper will be and the more quickly it will dry! If you’re not using a screen, tilt your tray over the sink to let some excess water drain off. Repeat a few times, wringing out the towel or using a new one if it gets too saturated. You can also blot it with a sponge to absorb some water.

Dry the paper. First, if you’re using a screen or deckle, remove your paper from it in a process called couching. Prepare a surface for it to dry on: it can be sandwiched in a stack of cardboard or laid on a towel-lined tray or cooling rack. Line up one edge of your deckle with the side of the drying surface, and in a quick, smooth motion, flip it face down onto the surface like you’re closing a door. The paper should release from the screen.
Leave the paper to dry. After a few hours or overnight, you can flip it over to help the process, but it will be very delicate before it dries so be gentle! When fully dry, which can take a couple days, it will be stiff, the color will lighten, and it might have warped. You can flatten it out under a heavy book.
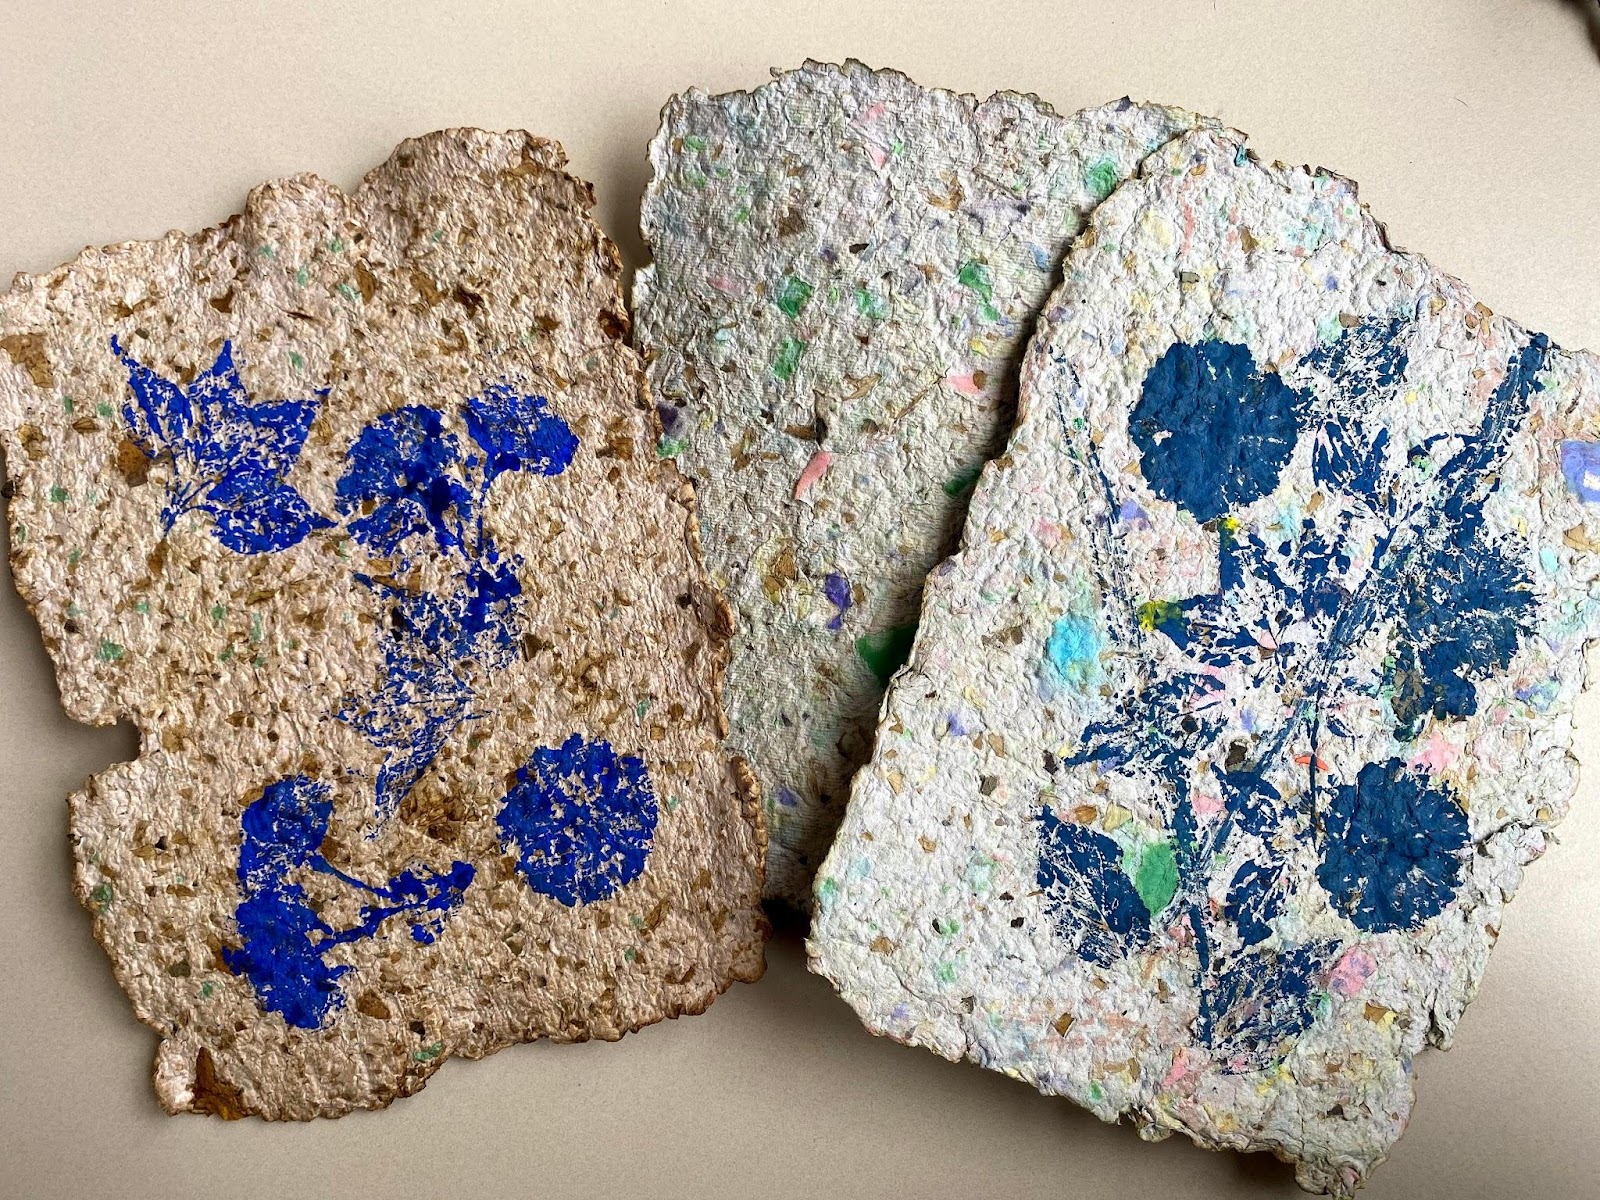
What will you make with your paper? The sturdiness and texture make it great for painting! I decided to make plant prints in blue, inspired by the cyanotype in Spirit.


Here’s how to make a plant print:
Collect some plants. Look for leaves with raised veins and flowers that aren’t too delicate. Mix up some paint (acrylic or tempera) on a palette or tray and either 1. spread some out in a thin layer then press the plant into it or 2. use a paintbrush to apply a thin layer. Arrange the plants on your paper, then place a scrap piece of paper over the top and use your fingers to press down firmly all over the leaf or flower (you might want to test on scrap paper first!). Repeat as desired.

Share your artworks with us here on the blog or on our other social media!
Good
Wow
We’re always amazed by the art-making activities our educators come up with; they surprise us every time!