

Alyssa Dumire, Director of Children’s Education
You might have heard that the seventeen-year hibernation of the Brood X cicadas is coming to an end this spring, and they’ll soon be reemerging! Once the soil temperature reaches 64 degrees–which, with the warmer temperatures we’re experiencing this week, could even be by the time this is posted–swarms of cicadas will noisily make their way out of their underground dwellings to breed. This has been the source of much chagrin for those who don’t like flying insects, but it’s important to keep in mind that the cicadas don’t care about us–they’re just here to do their thing then retreat back underground. I’ve always been fascinated by insects, mostly from a visual standpoint (I’d rather not touch them), and so have many other artists! Today, we’re going to look at work by three artists who incorporate bugs into their work to help us prepare for the coming onslaught of cicadas. Maybe you, too, will notice their beauty when they arrive!
Can you find the three bugs in this print by Katja Oxman?

A bumble bee and stag beetle rest toward the left of the image, while a card on the right is decorated with an intricate moth. The title, An Open Window, implies that these bugs wandered inside–maybe the bee was drawn by the floral postcards!
The ceramic vessels below by Charlie Cummings use flies and ants to create surface patterns. You wouldn’t want to see an ant crawling out of a jar of food, but maybe a painted one would be okay! Here, the bugs add an air of humor and playfulness, like the ants-on-a-picnic-blanket motif.


And finally, on the left, we have our friend, the cicada, here sculpted in clay and glazed a soft, translucent turquoise. Like Andrea Peterson’s Spirit, this work was included in the Sand Steel Spirit portfolio, created by Michigan City area artists to celebrate their corner of northwest Indiana along the shores of Lake Michigan. Why do you think Laurel Izard chose the cicada for her contribution?
Inspired by these artists and the incoming swarm, let’s make our own paper cicada! To emphasize the patterns on our paper cicadas, we’re using a watercolor resist technique.
Here’s what you’ll need:
- Paper (watercolor or a heavier drawing paper)
- Pencil
- Scissors
- Oil pastels or crayons
- Black watercolor paint and a large paintbrush
- Glue
- Stapler
- 3 pipe cleaners


First, trace the shape of your insect’s body on one half of your paper. Make it about the full width of the paper. Like all insects, cicada bodies have three sections: head, thorax, and abdomen. The abdomen makes up about half the total length and curves down to a point, while the head and thorax are both flattened ovals. Sketch in two ovals for the eyes, too!
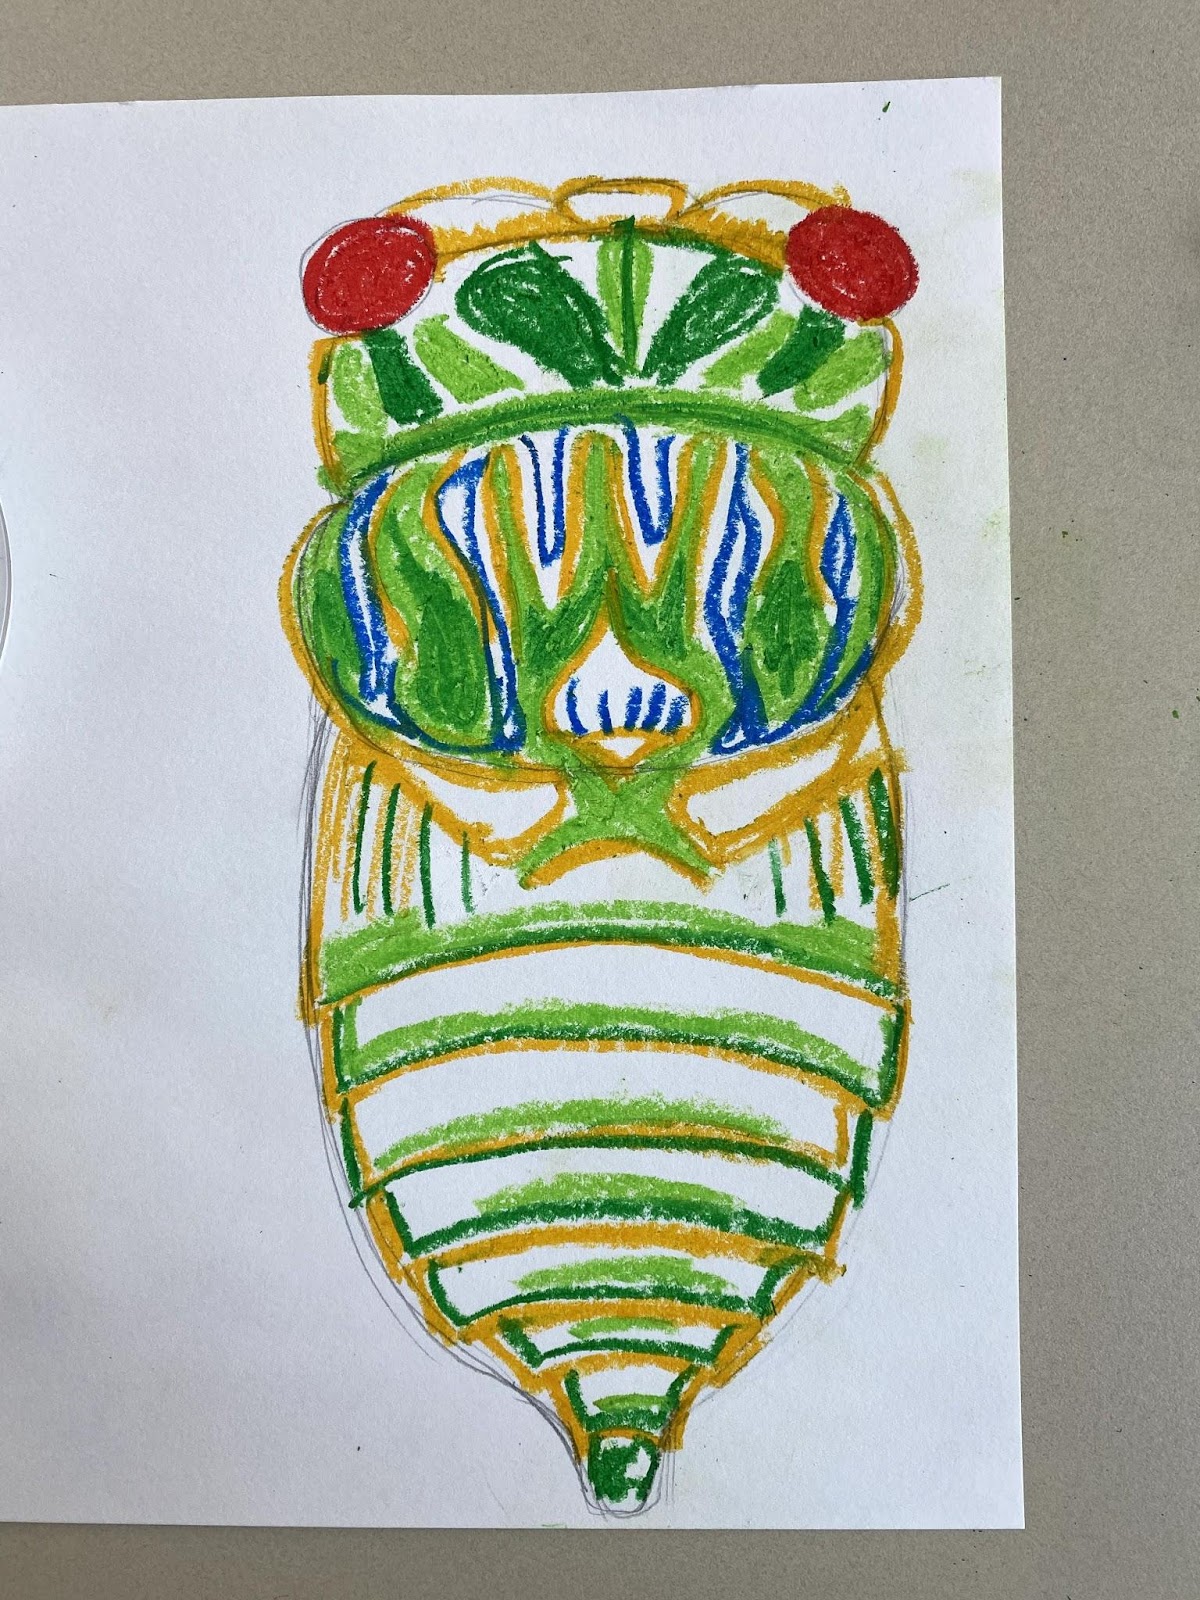
Now, grab your oil pastels or crayons and add some color! Keep in mind that we will be painting over the entire bug with black watercolor, so anything you don’t color will be black. Be sure to thoroughly fill in the areas you want to be colored, pressing hard, and remember that insects are symmetrical, so anything you do on one side, you should also do on the other! I started with the markings on the actual cicada, adding a few more details and brighter colors. You can use any colors you like!
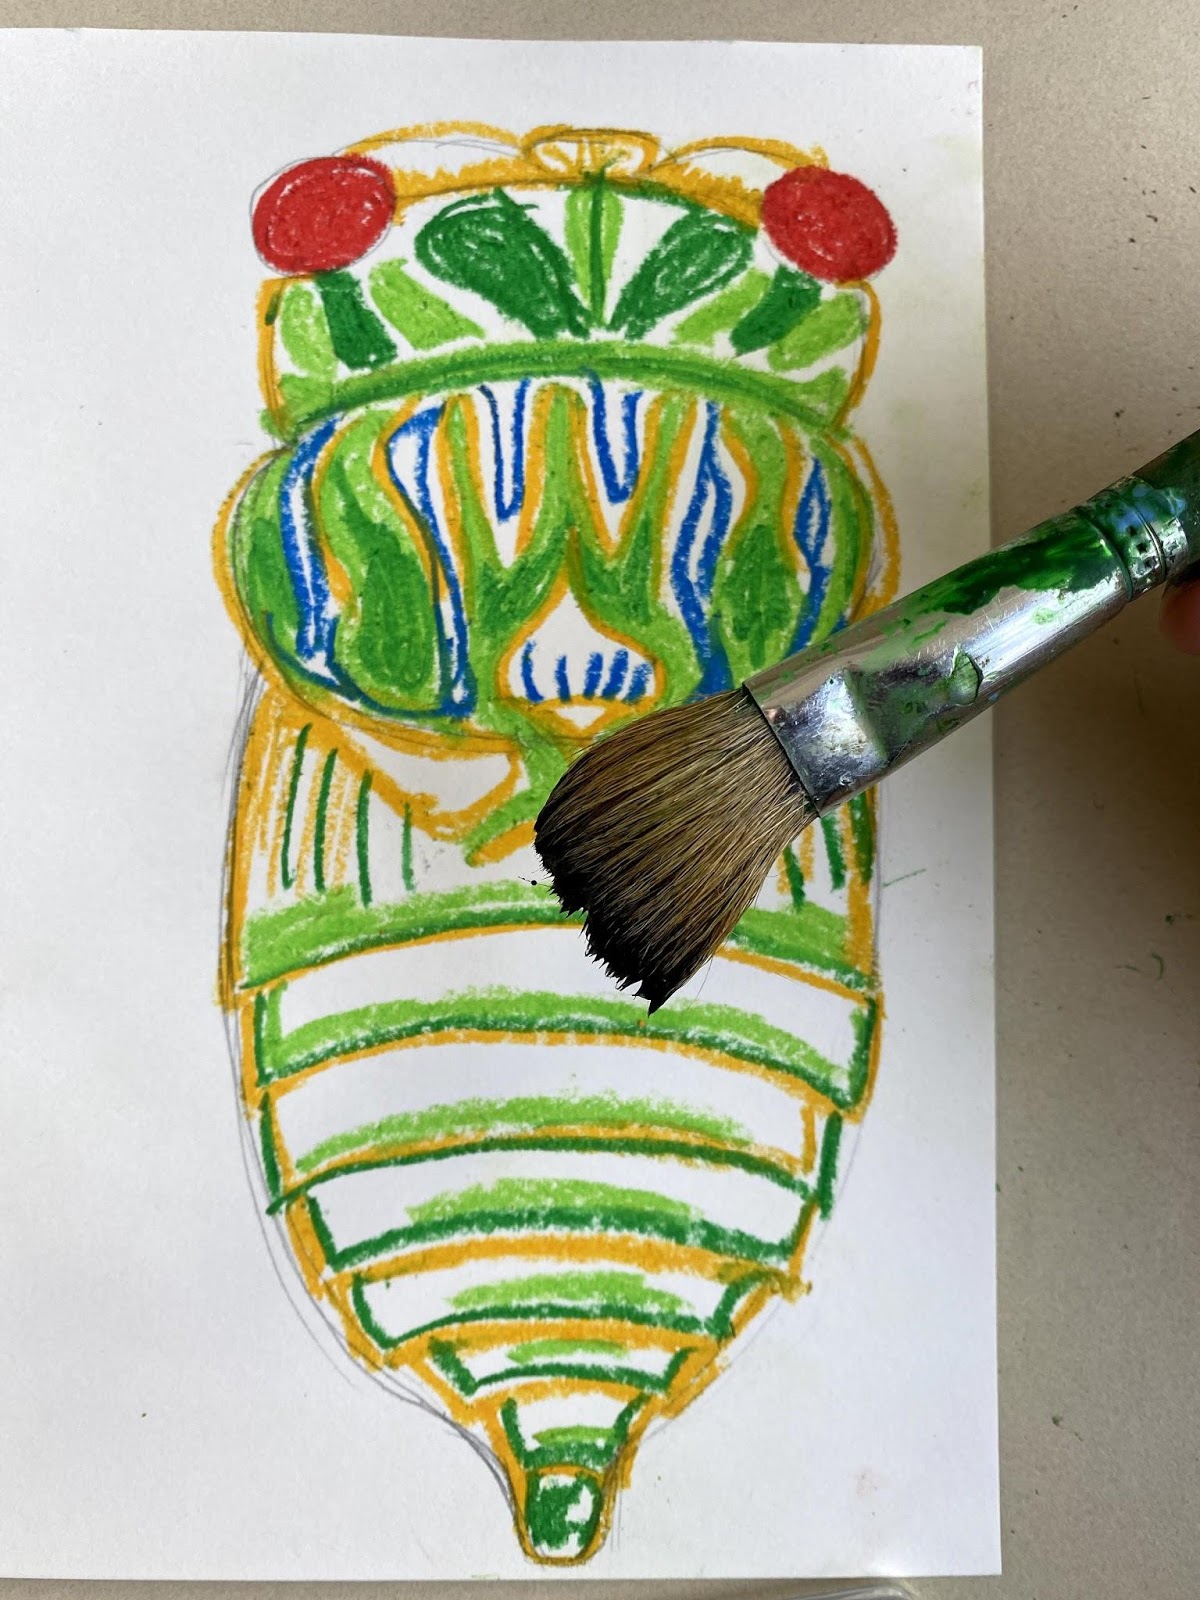
Once you’re happy with the pattern and you’ve colored all you want to, cut the cicada from the rest of the paper (don’t cut closely around it yet–we just want it separate so we can use the other half of the paper). Load up a big brush with black watercolor paint and paint over the whole thing. Set it aside to dry.


Now we can work on the wings! On the other half of your paper, draw a wing shape that takes up the entire width. The wings are almost a teardrop shape, but one that is a little uneven. Draw one, then cut it out and use it as a template to cut out the other.


Make sure your wings are facing the right way before you start drawing–they should mirror each other. Draw long ovals to make the sections of the wings, then use white to fill in the middle of each section, leaving a little space around the outlines to fill in with the black paint. Repeat on the other wing, trying your best to keep the markings symmetrical. Now, paint watercolor over the wings, too, and set them aside to dry.


If the body is dry, it’s time to add legs! Fold the body in half lengthwise, then do the same with all three pipe cleaners. Holding the pipe cleaners together, match their fold up with the fold of the bug (on the bottom), then staple them in place near the outer edge at the top of the thorax on both sides (an extra set of hands helps here!). We will be attaching the wings in the same spot to hide the staple.
Bend the legs into shape.

Once the wings are dry, use a dot of glue to attach them right where you stapled on the legs.
I took my cicada on a trip around the museum’s grounds. Where will you display yours?


Share your cicada with us here on the blog or on our social media: Facebook, Twitter, Instagram.