

Alyssa Dumire, Director of Children’s Education

Mark di Suvero’s Helmholtz, pictured above, with its bright, red-orange I-beam construction, is an icon of the Arts Campus. This type of large-scale sculpture is Suvero’s “claim-to-fame”, and they’re installed as public artworks all over the world, reflecting the artist’s global upbringing: he was born Marco Polo in China to Italian parents and moved to San Francisco with his family at age eight. After studying sculpture and philosophy at the University of California he moved to New York City where he drew inspiration from the Manhattan docks. He turned to steel I-beams as a material after a traumatic construction accident left him with a broken back and leg (doctors said he would never walk again, but after a year of recovery he was back on his feet with the help of crutches). Prior to this life-changing event, he was primarily working with wood, but after, he discovered that he could use a crane as a paintbrush and massive beams as his marks. Although best-known for his public sculpture, he continued to work on a smaller scale as well, as with Han Study #3, currently on view at FWMoA in A Century of Making Meaning.
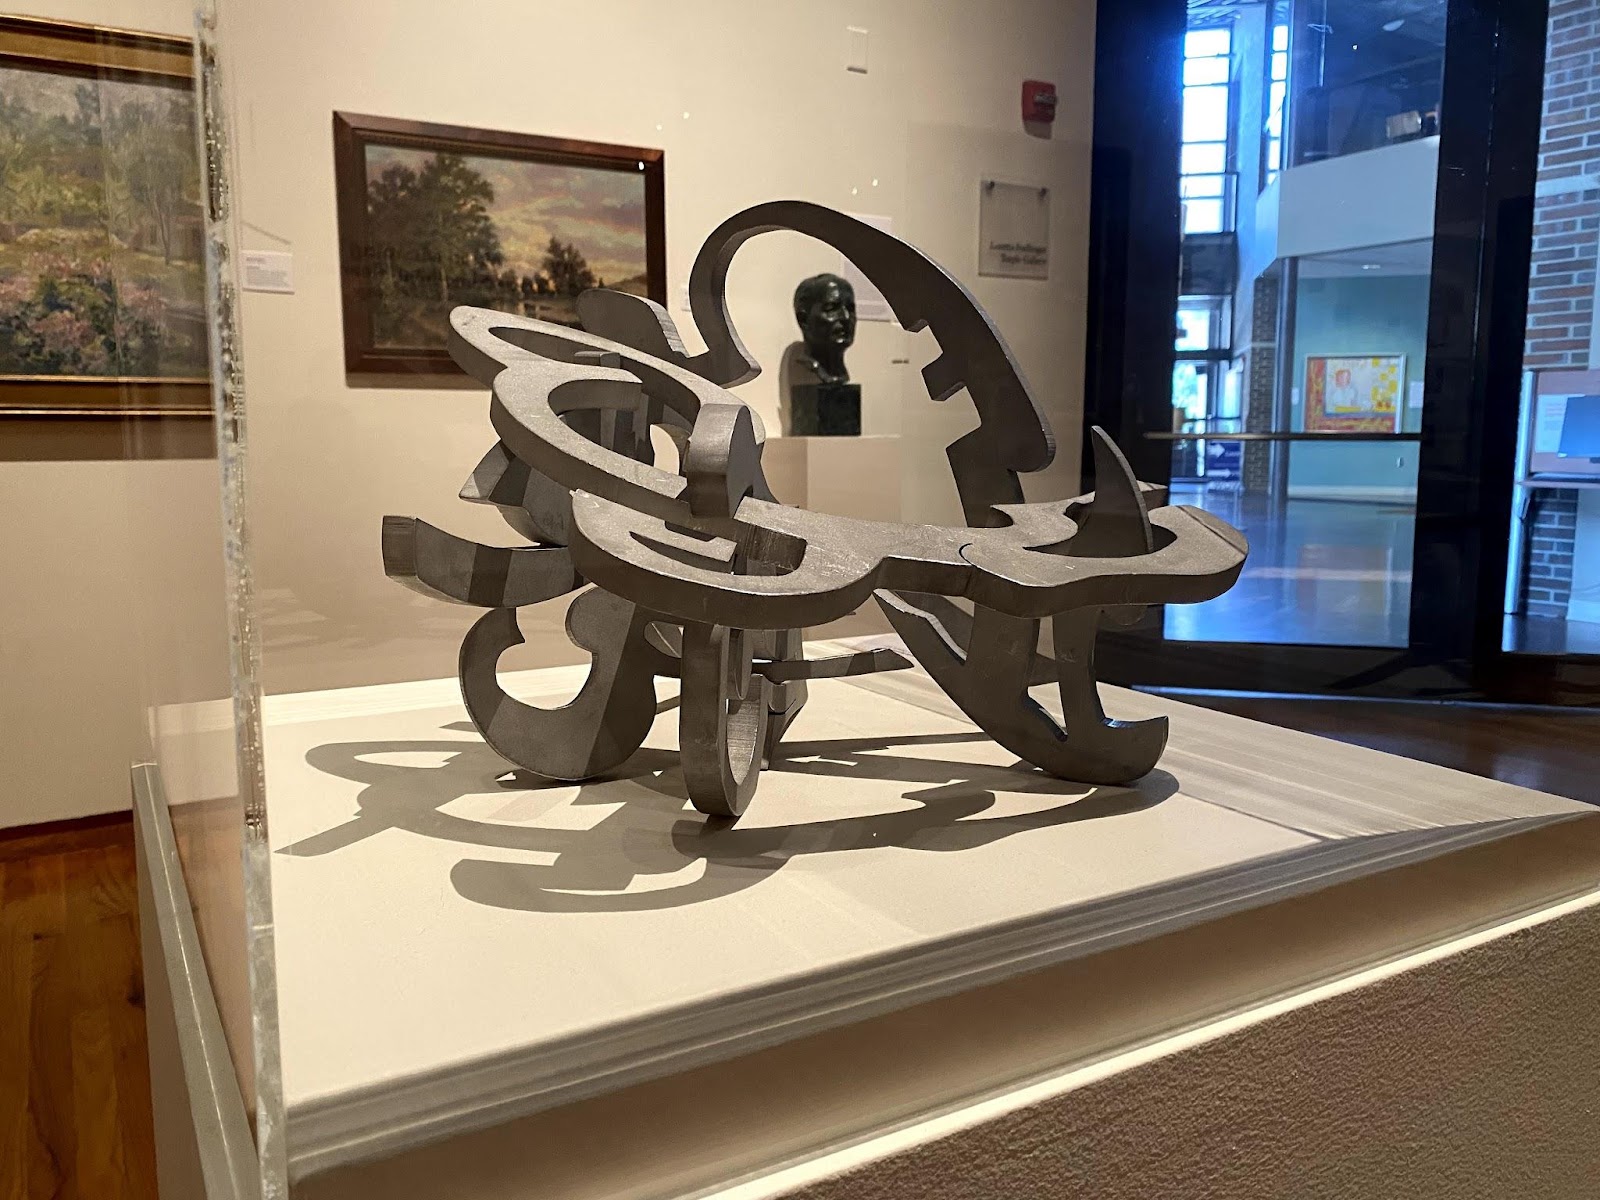
At a glance, Han Study #3 and Helmholtz have little in common, except that they’re both assembled from individual metal components. Do you notice any similarities? In their own ways, they both reflect di Suvero’s joyful and playful attitude towards his work. Helmholtz might resemble a playground, and, in fact, the artist would encourage children to treat his sculptures as such (although we would encourage you to keep your feet on the ground!). Some of my earliest memories of the Museum involve Helmholtz, and I’ve even talked with students who may have never entered our doors but know “that big red sculpture” with the same fondness. Much of di Suvero’s work includes an element of interactivity: some large-scale sculptures include swings, while others, like Han Study #3, are puzzles.

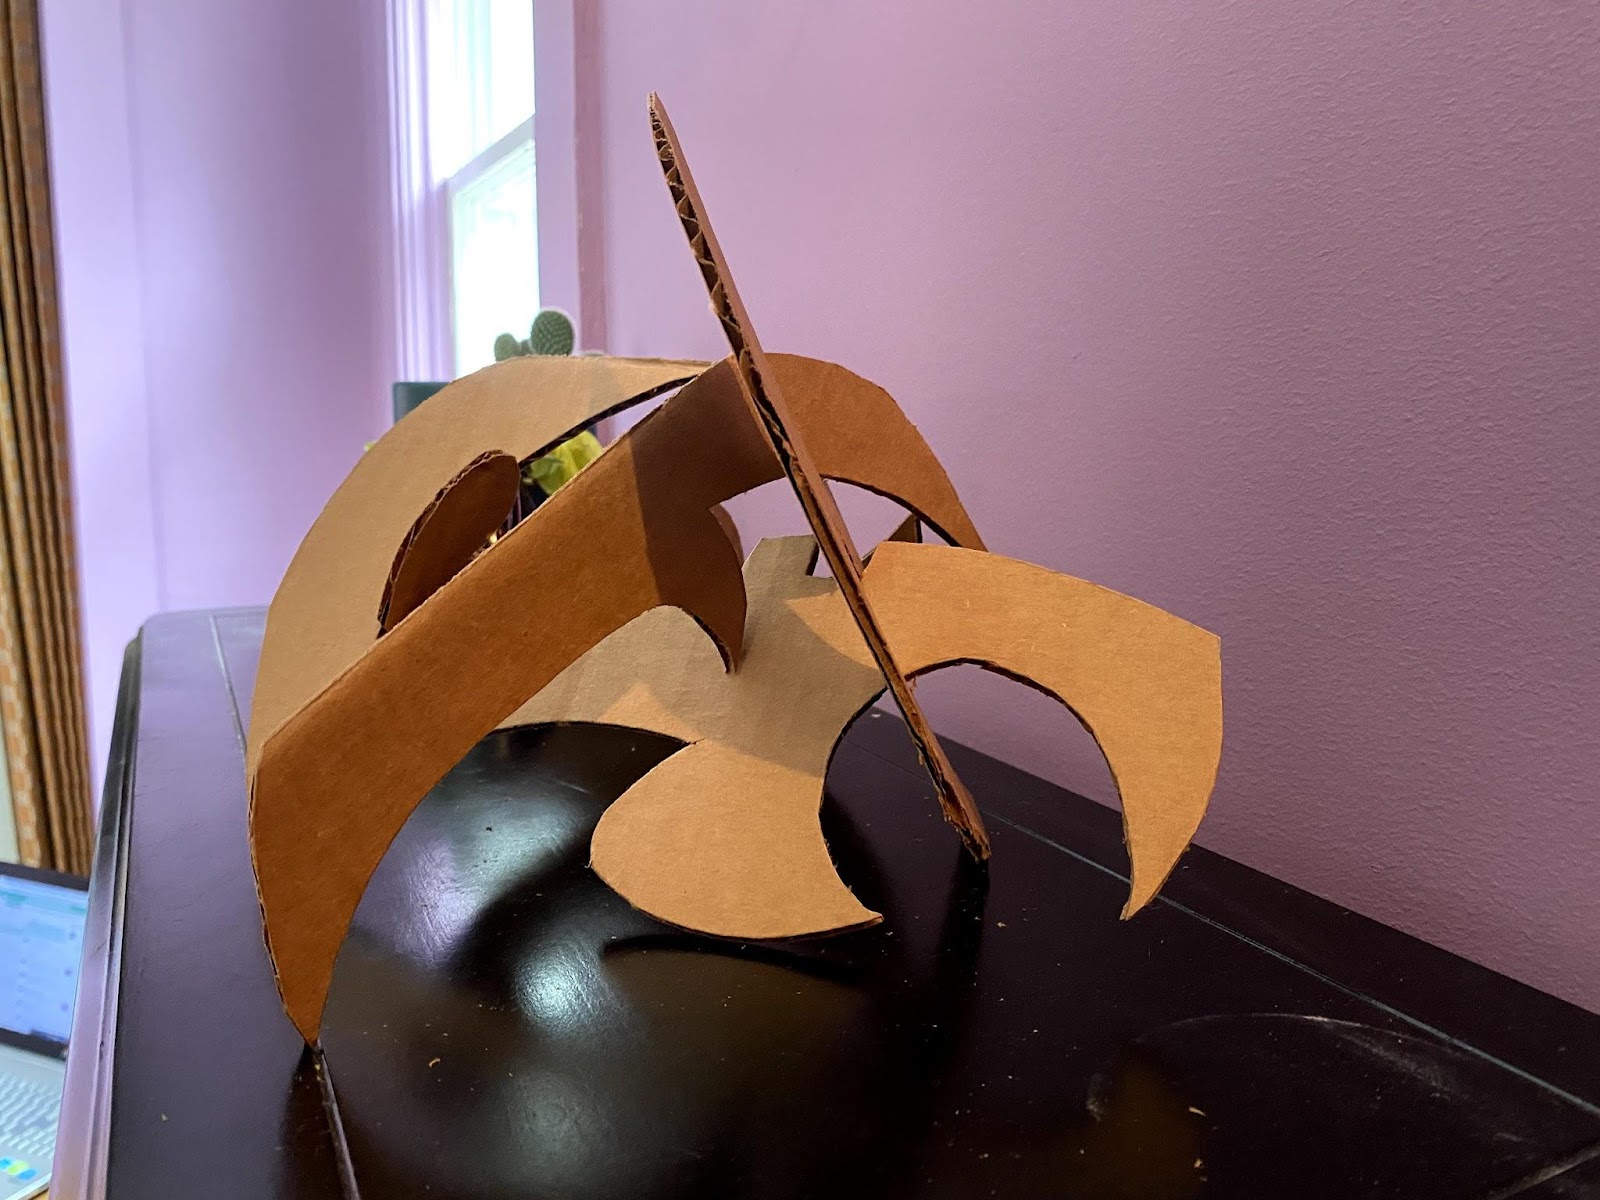
The individual elements of the sculpture are not welded, glued, or otherwise adhered to one another: it relies only on balance and friction to hold itself up and looks a little different every time it’s installed! When it returns to the vault, it will be stored flat as all five components were cut from a single piece of aluminum and fit back together. You’ll find a plastic replica of Han Study #3 in the Learning Center to test your assemblage skills–it’s more difficult than you might expect! Working with a team and adapting di Suvero’s playful, can-do attitude (it might take a few tries) helps.
Want to make your own puzzle sculpture to challenge your family at home? Gather these materials:
- Paper or cardstock
- Pencil
- Cardboard (one side of a box)
- Scissors
- Craft/Xacto knife (and an adult to wield it)
- Paint and brushes (optional)
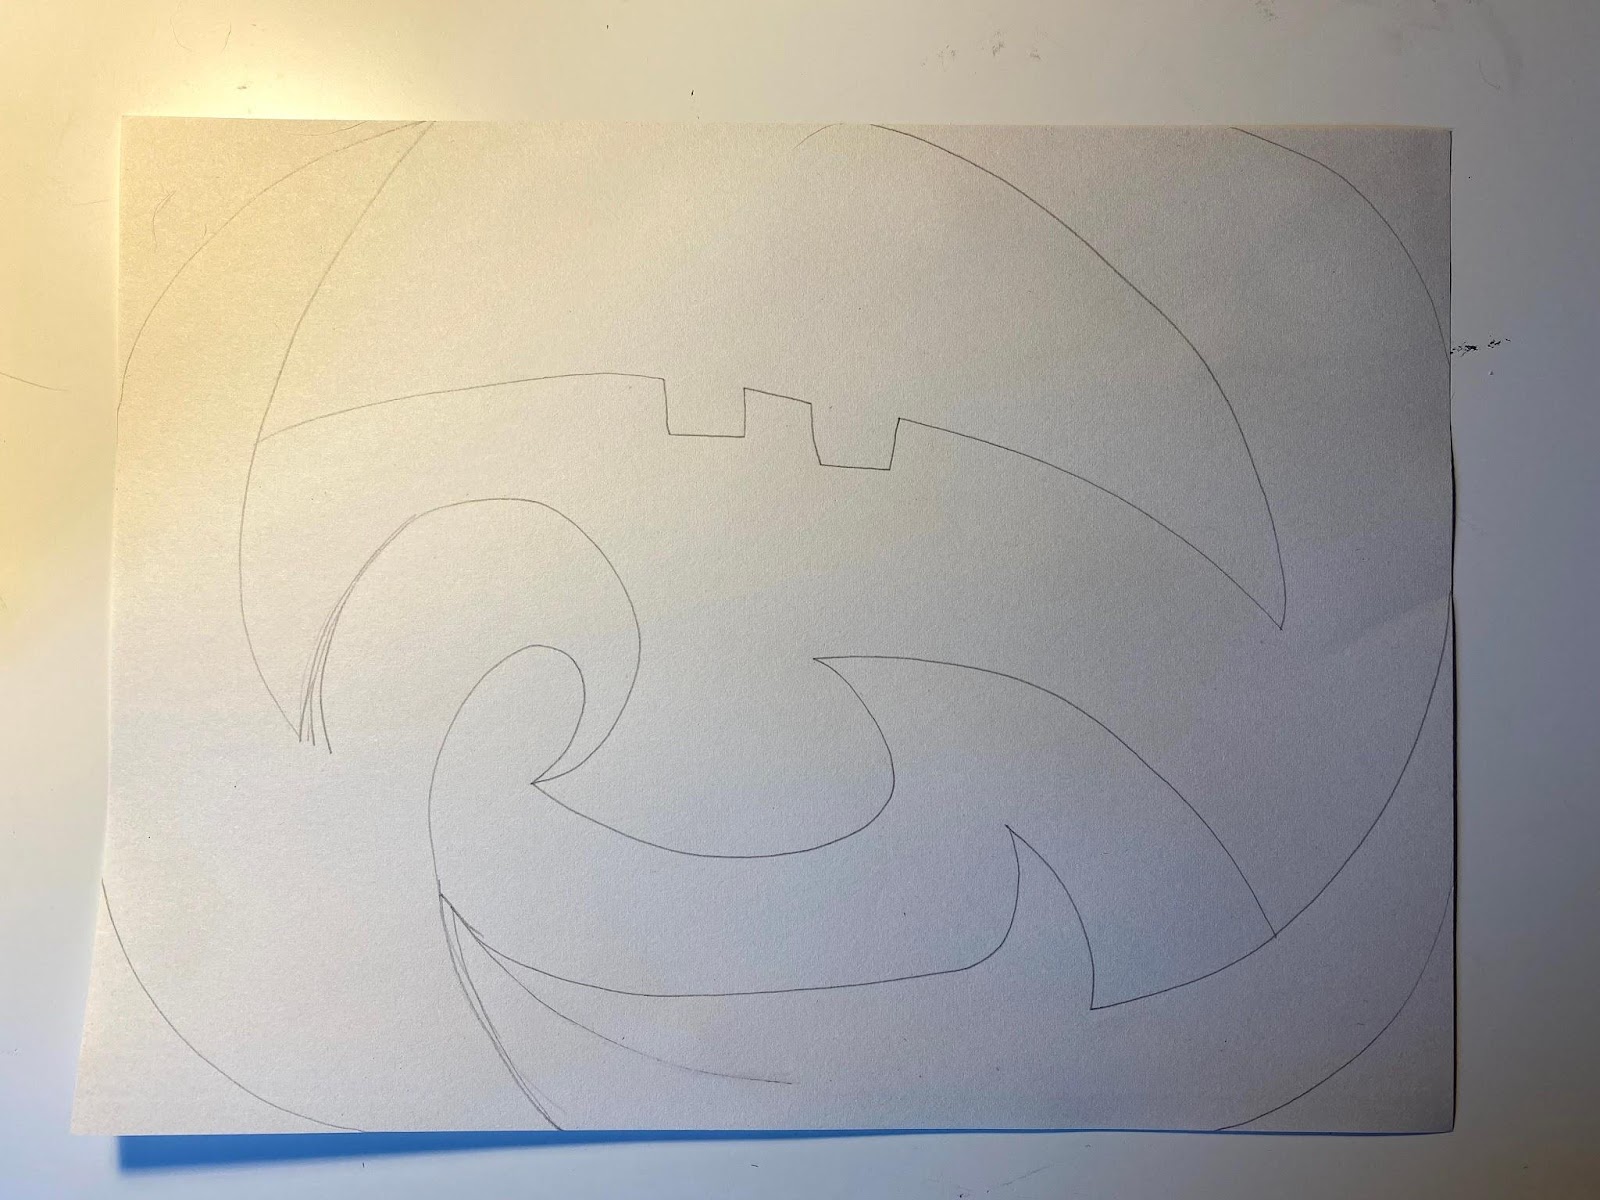
First, make a template. Draw lines across one sheet of paper to create 4-6 shapes, filling the entire page (you can round off the corners first, as I did). You want your shapes to be interesting, but remember that we’ll be cutting them out of cardboard, so the more intricate, the more difficult that will be. Do try to include some notches or sharp corners so the pieces can fit together more securely. Mark each shape so you can tell one side from the other (you’ll want them all face-up when you trace them).
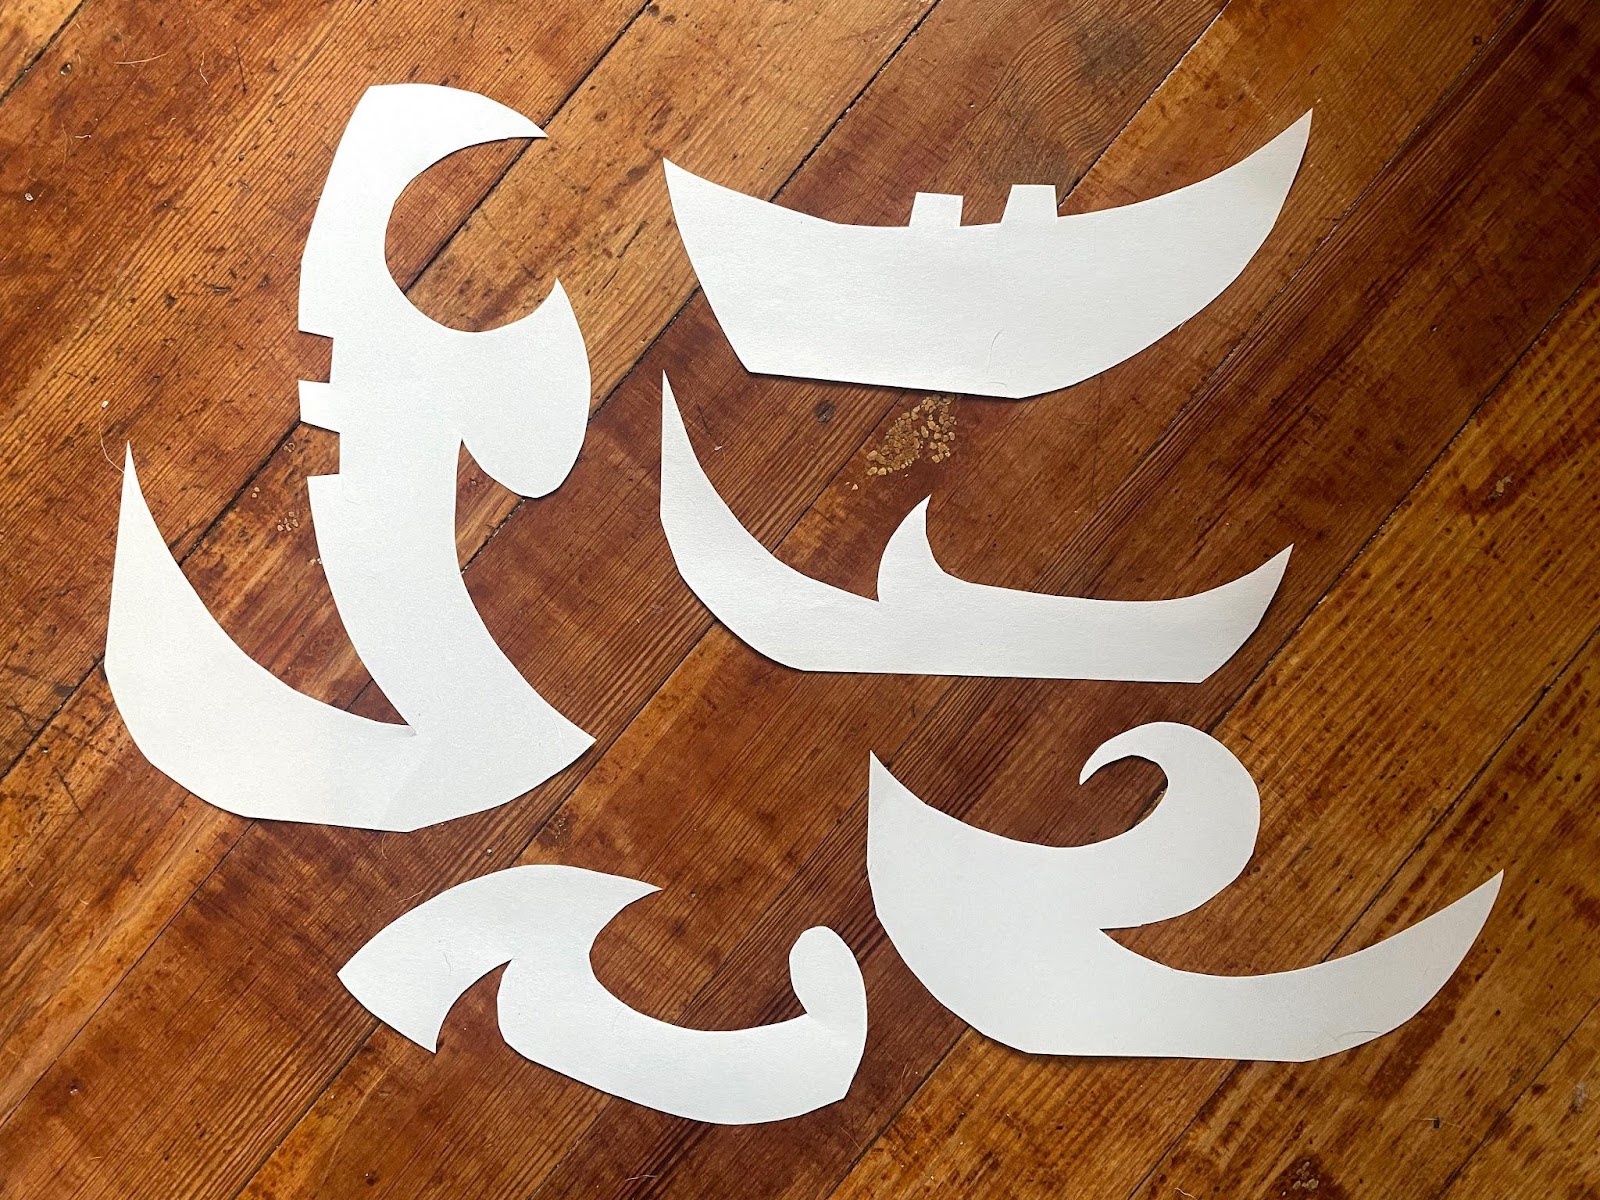
Cut the shapes apart with scissors. It can be hard to see what each piece will look like before they’re cut apart, so lay them out and make sure you’re happy with them before moving on to cardboard! If not, repeat the first step (you can’t just modify your original shapes as they won’t fit together again).
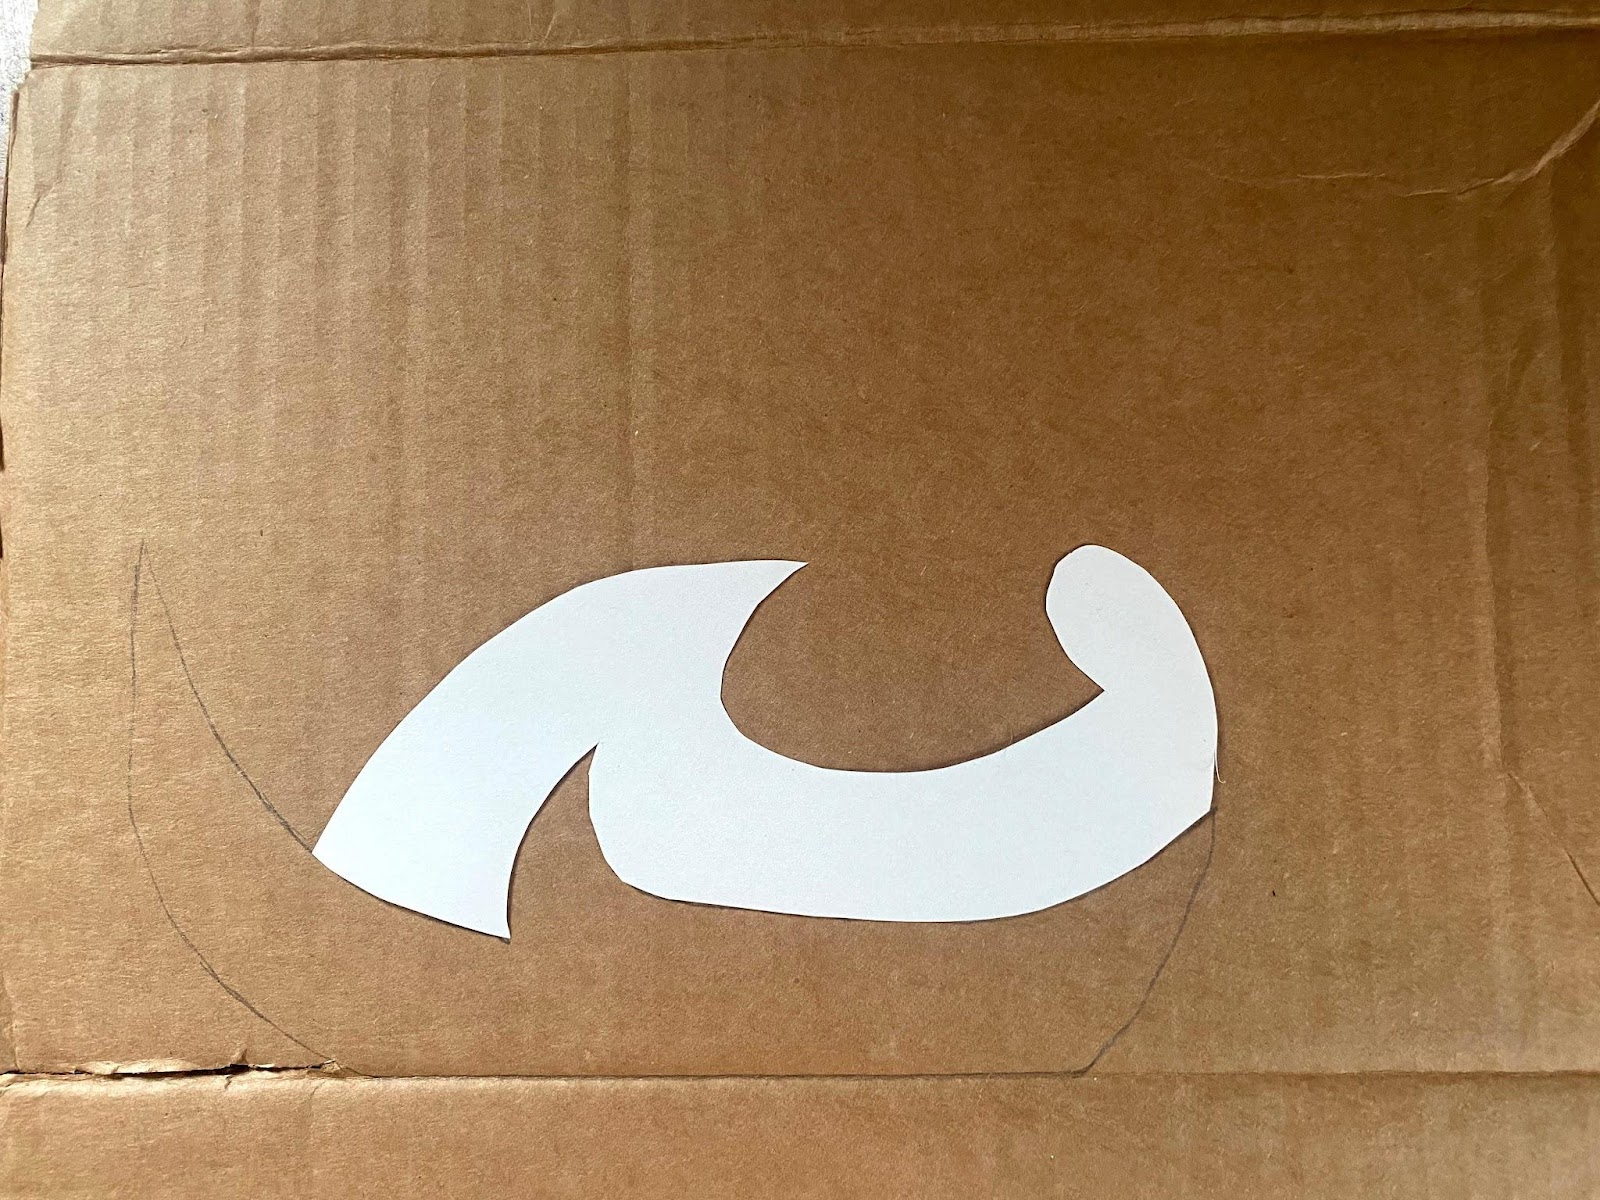
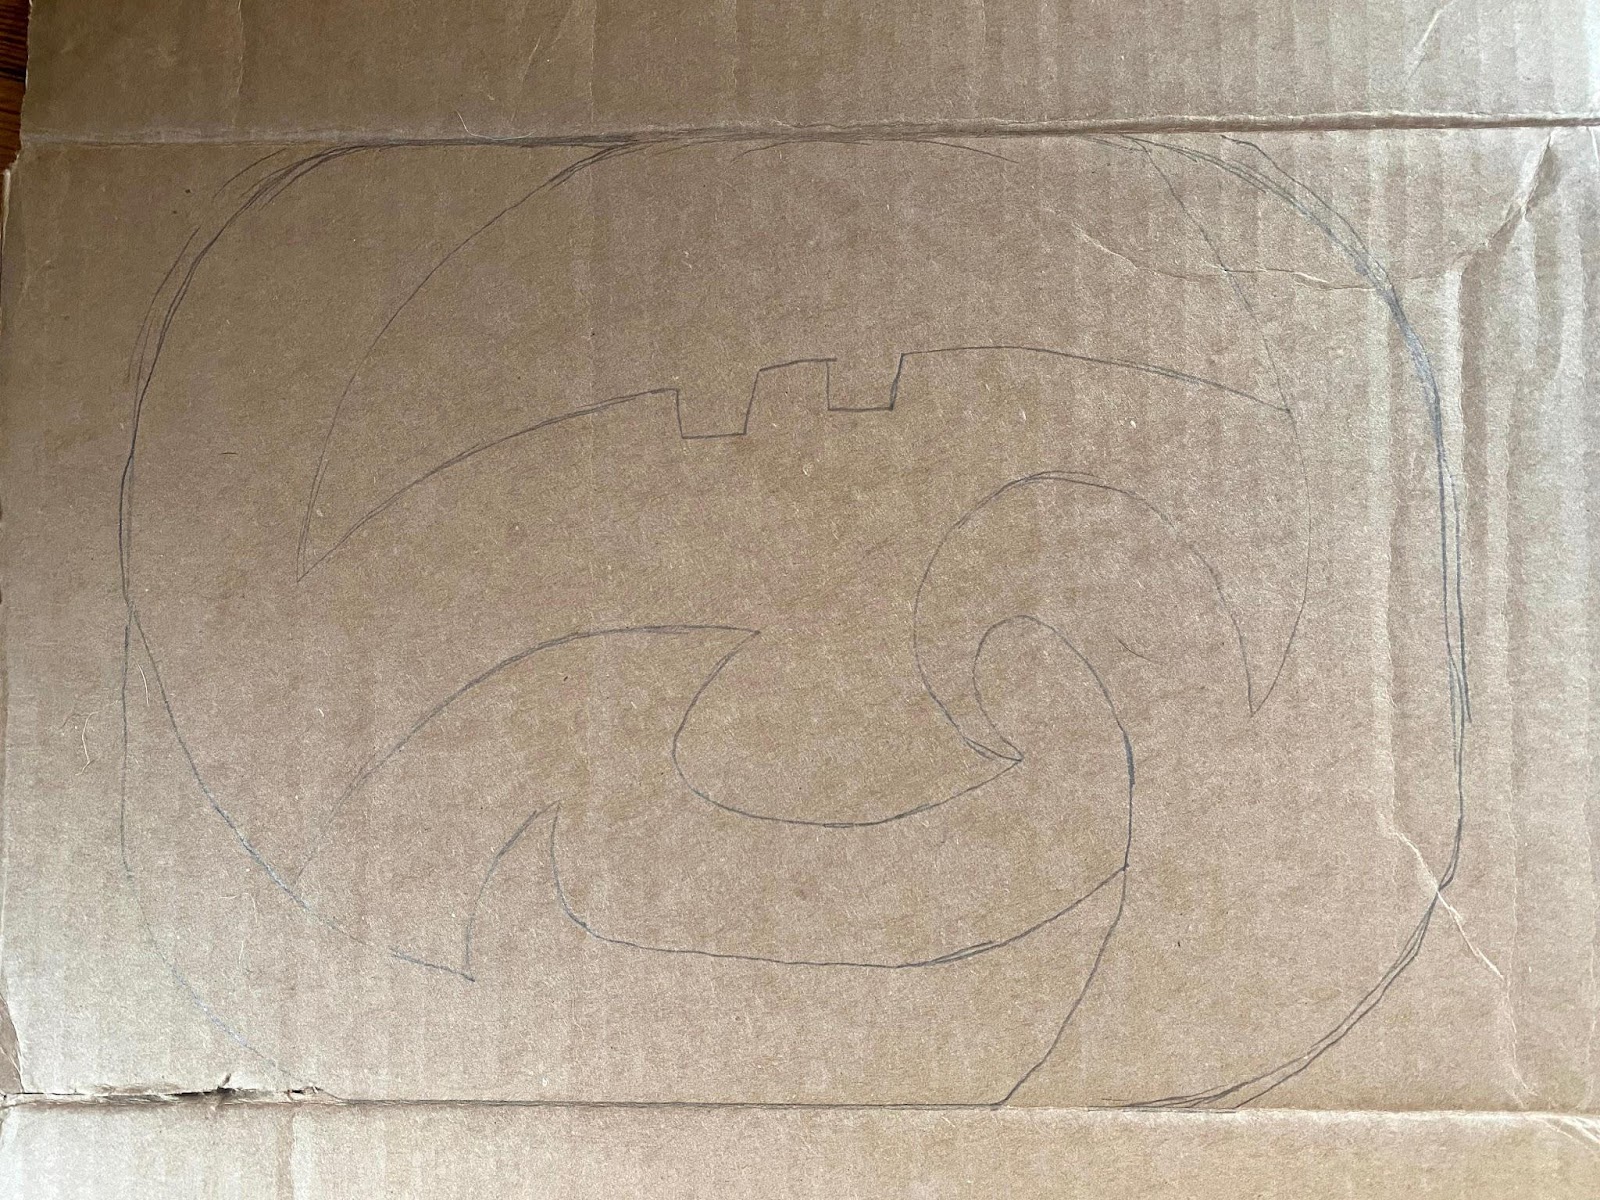
Now, take each shape template and trace it onto the cardboard, aligning each one in its original formation to make sure the final version will properly puzzle together.
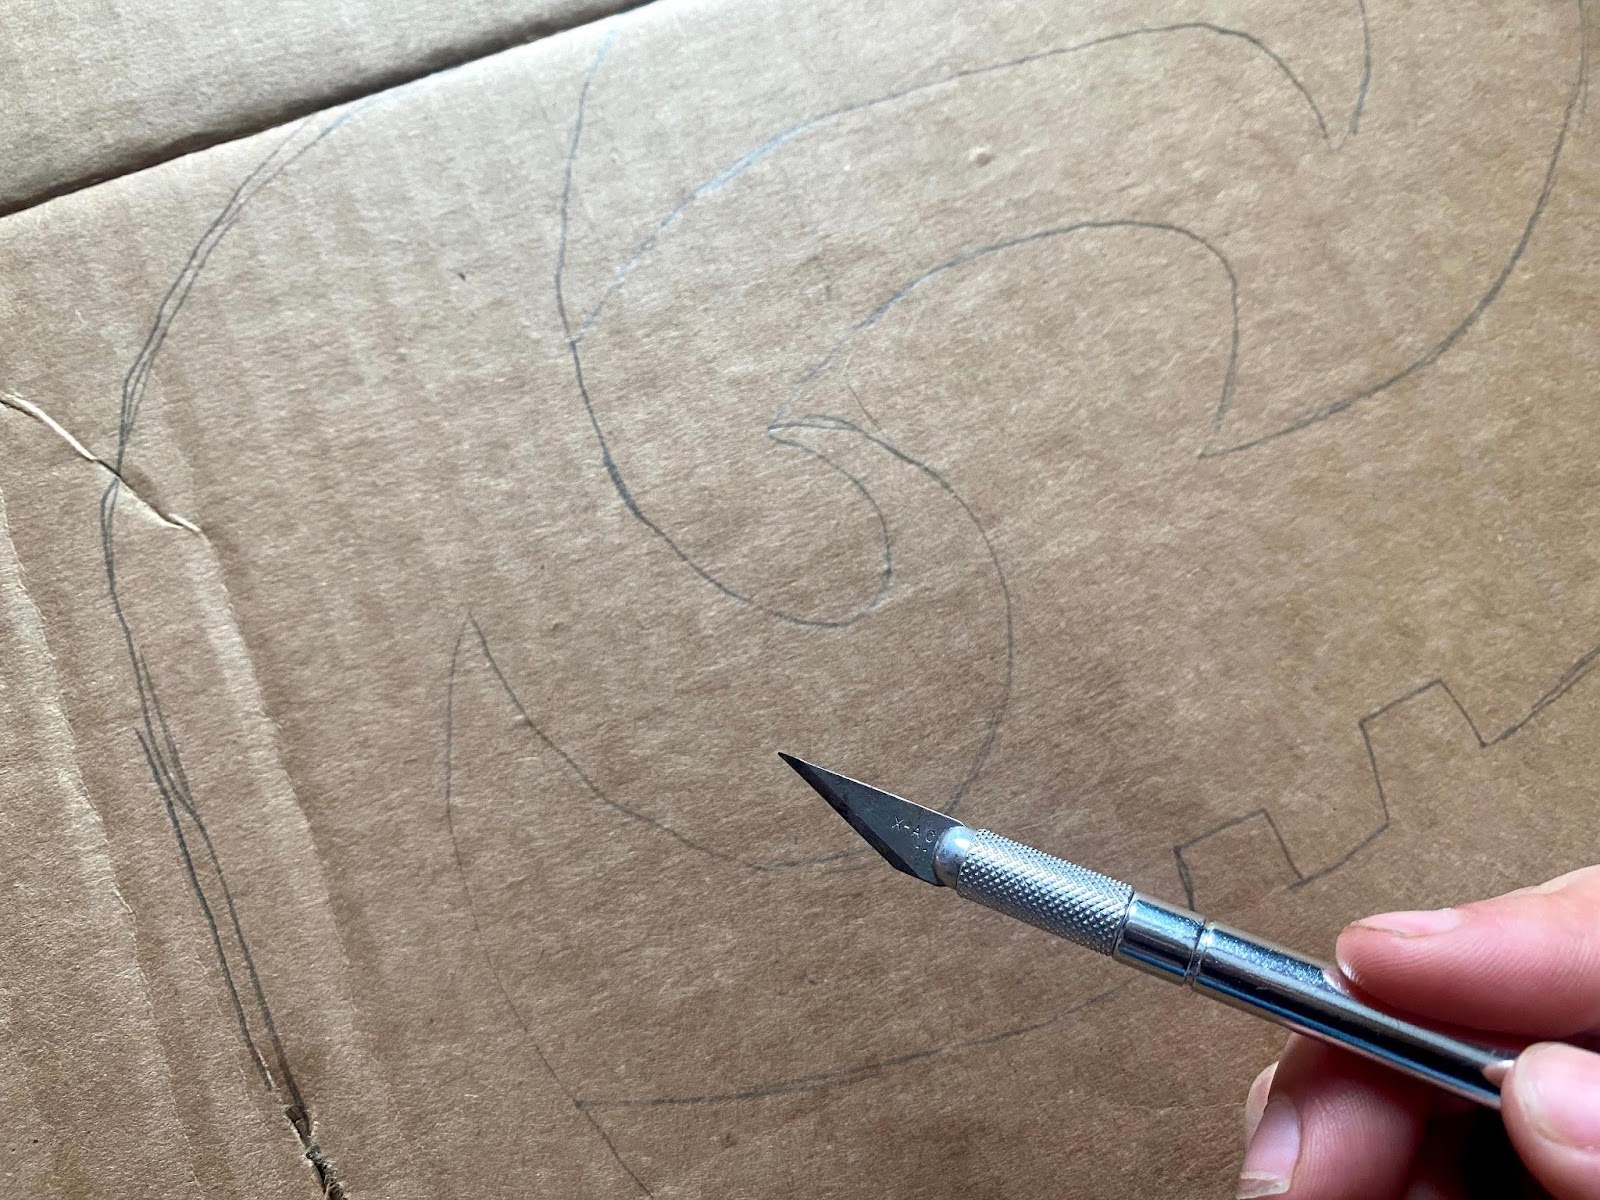
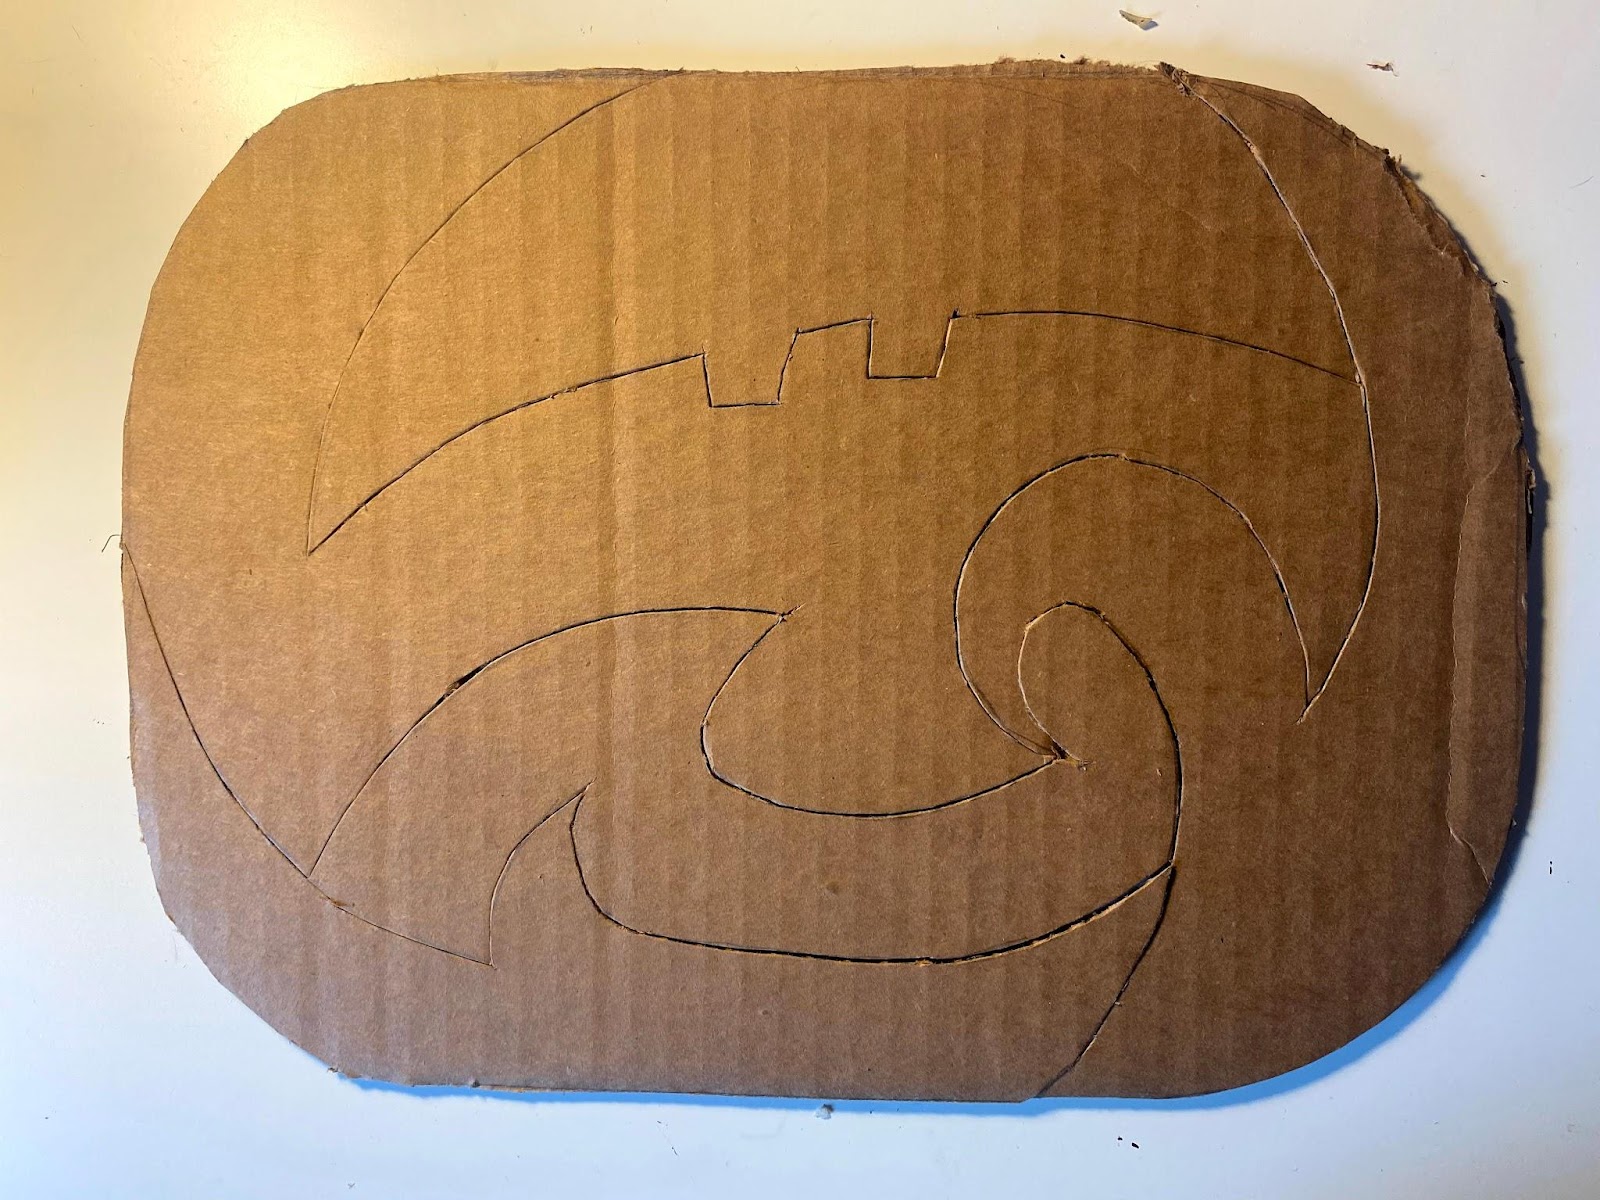
Cut the pieces out from the cardboard. You may be able to do this with scissors, but an Xacto knife will likely be easier and result in cleaner edges. Take your time and be careful! A helpful cutting tip: don’t apply too much pressure with the knife, instead going over each line multiple times. Flip the cardboard over from time to time; once you can see your cut marks on the back, finish cutting through from that side for cleaner edges.
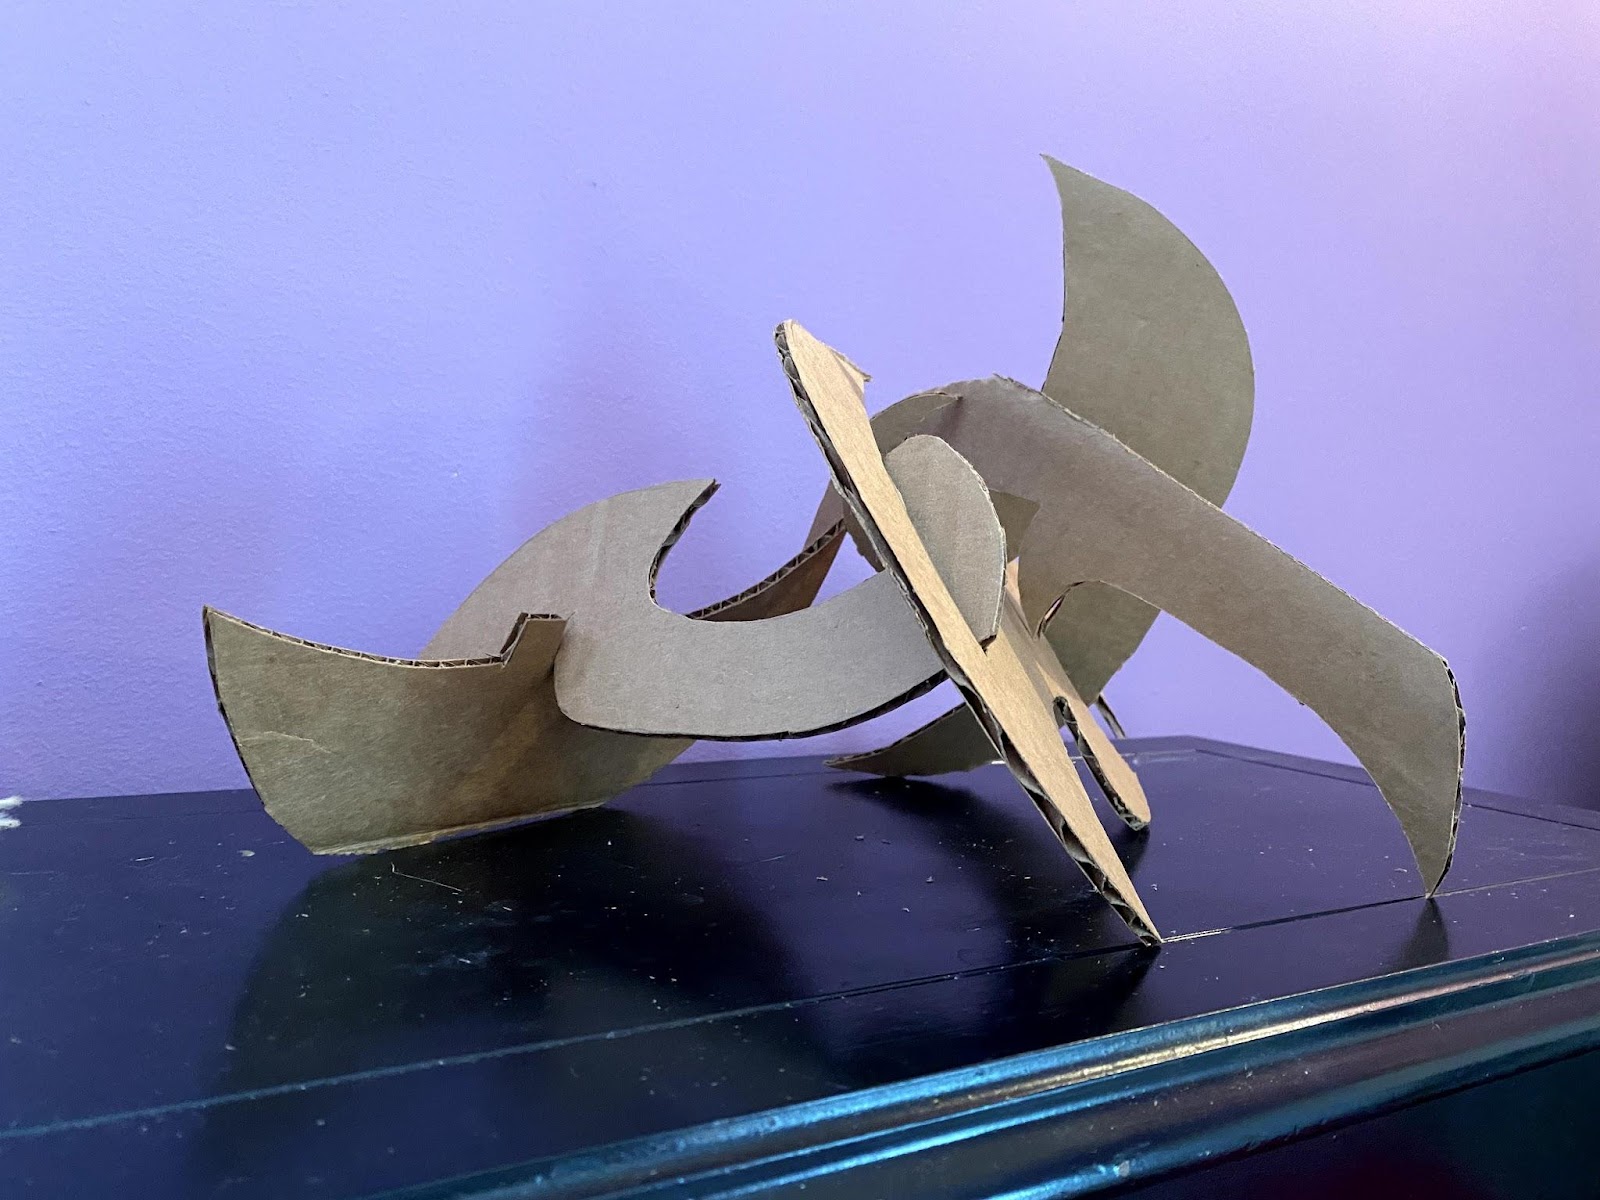
Put it together! How does your puzzle sculpture stack up?
You can leave the cardboard “raw” (reminiscent of some of di Suvero’s raw steel sculptures), but I decided to paint mine.

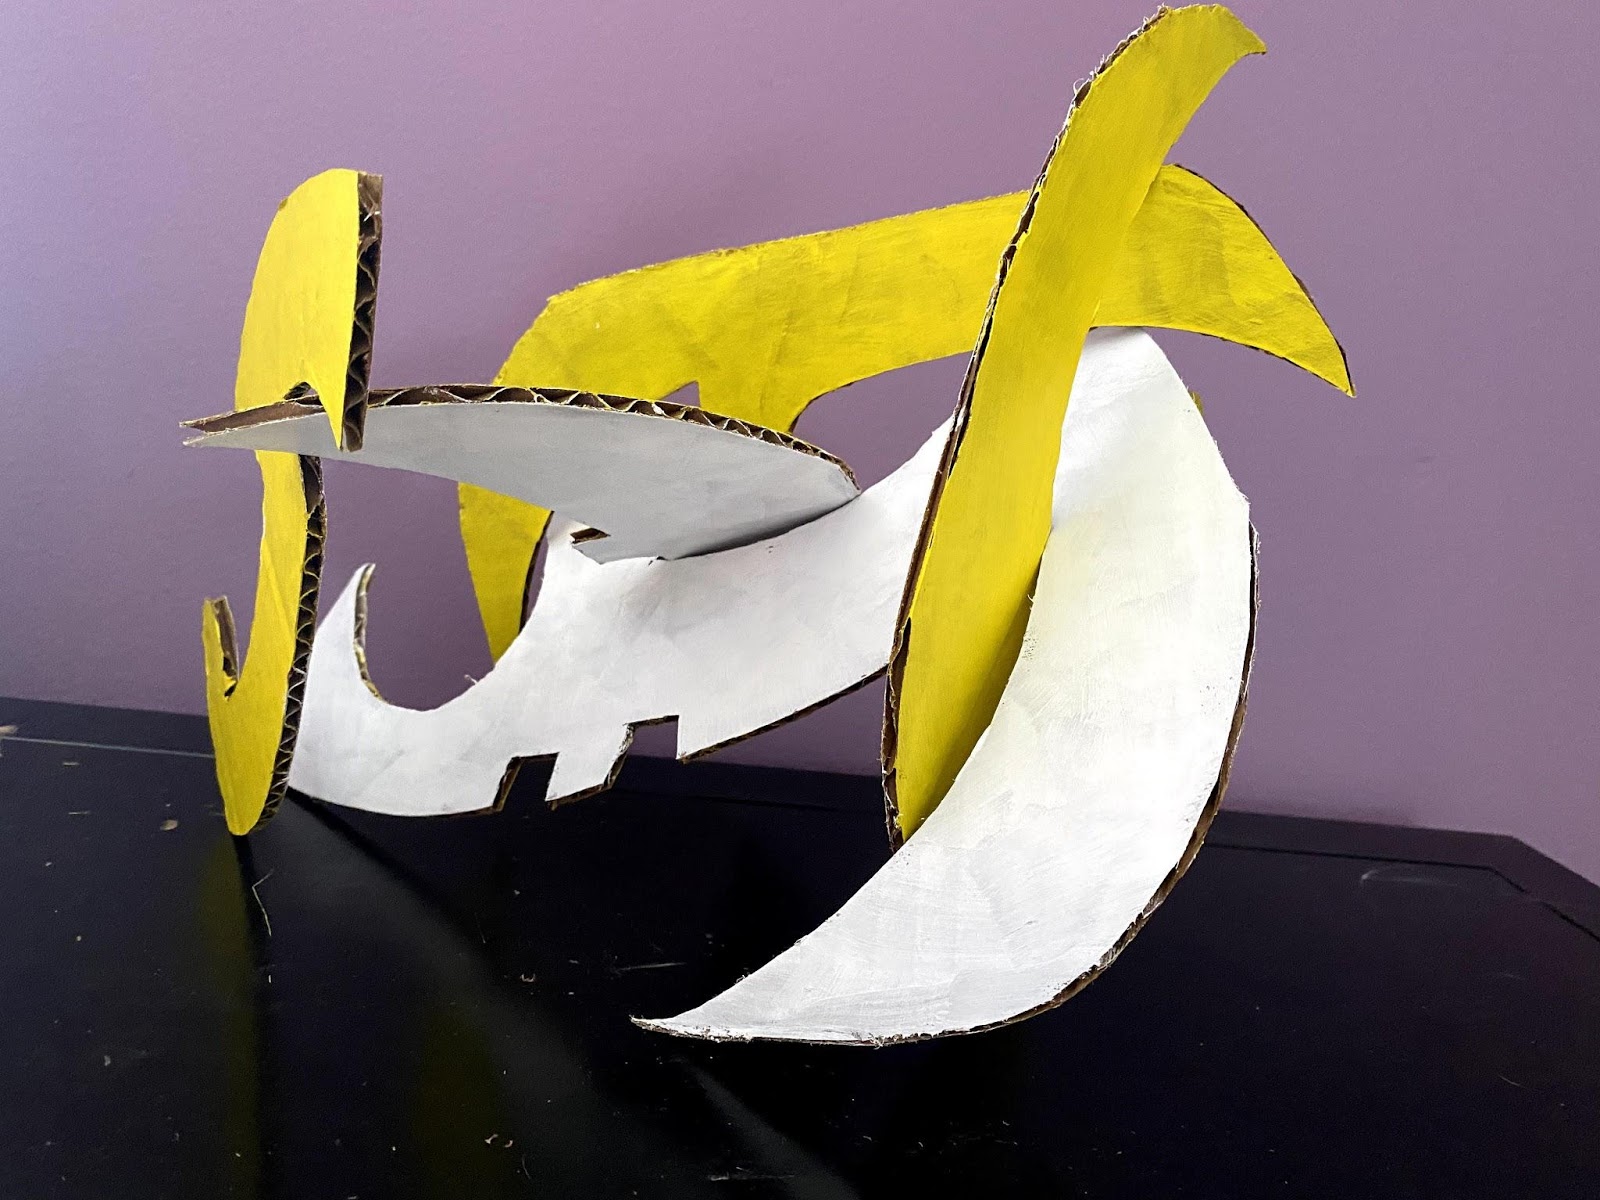
Once your puzzle pieces are complete, try different ways of assembling your sculpture: make it as tall or wide as possible, the most visually interesting, or see who can get it upright the fastest!