

Naomi Vanderleest, Education Assistant
Today in the studio we are creating sculptures inspired by Dorothy Gillespie. Gillespie wasn’t always known as a 3D artist, but after experimenting with materials to avoid the framing costs of a large painting show, she began to work exclusively in aluminum. Some compare her sculptures to fireworks or ribbons. What does this sculpture look like to you?

On view outside FWMoA in the Sculpture Court, these works move with the wind and our eyes. A principle of art that guides us through an artwork, the pieces of aluminum turn and twist in all directions but connect in the middle; Gillespie’s moving forms helps us imagine these pieces as bursting and swaying ribbons, fireworks, or flowers. Can you make a pose that captures this sculpture’s movement?
Gillespie painted, bent, and constructed each of her works, which is uncommon amongst sculptors, but lightweight aluminum doesn’t require heavy equipment or a large team of people. The project we are making today can also be done solo; all you need are the materials below:
- Construction Paper
- Tape
- Scissors
- Coloring supplies (markers, colored pencils, crayons)
- Pencil
First, cut long strips of paper, similar to the strips of aluminum seen in Gillespie’s work. The width of the paper is up to you, but really thin paper can be difficult to work with because it can tear easily.
Before we start curling and folding our long strips, think about the design you want. TIP: If you want to add designs to your material, like Gillespie, draw on the paper before you fold it to help maintain the shapes. I decided not to make many designs on my paper because it was already brightly colored.
Next are a few examples of forms that you can create with paper, each of which show a different movement; your sculpture doesn’t have to use all of these techniques!
- To create a tight curl, use a pencil to roll the paper. Roll the paper in the opposite direction to create multiple curls; this allows one piece to move in multiple directions!

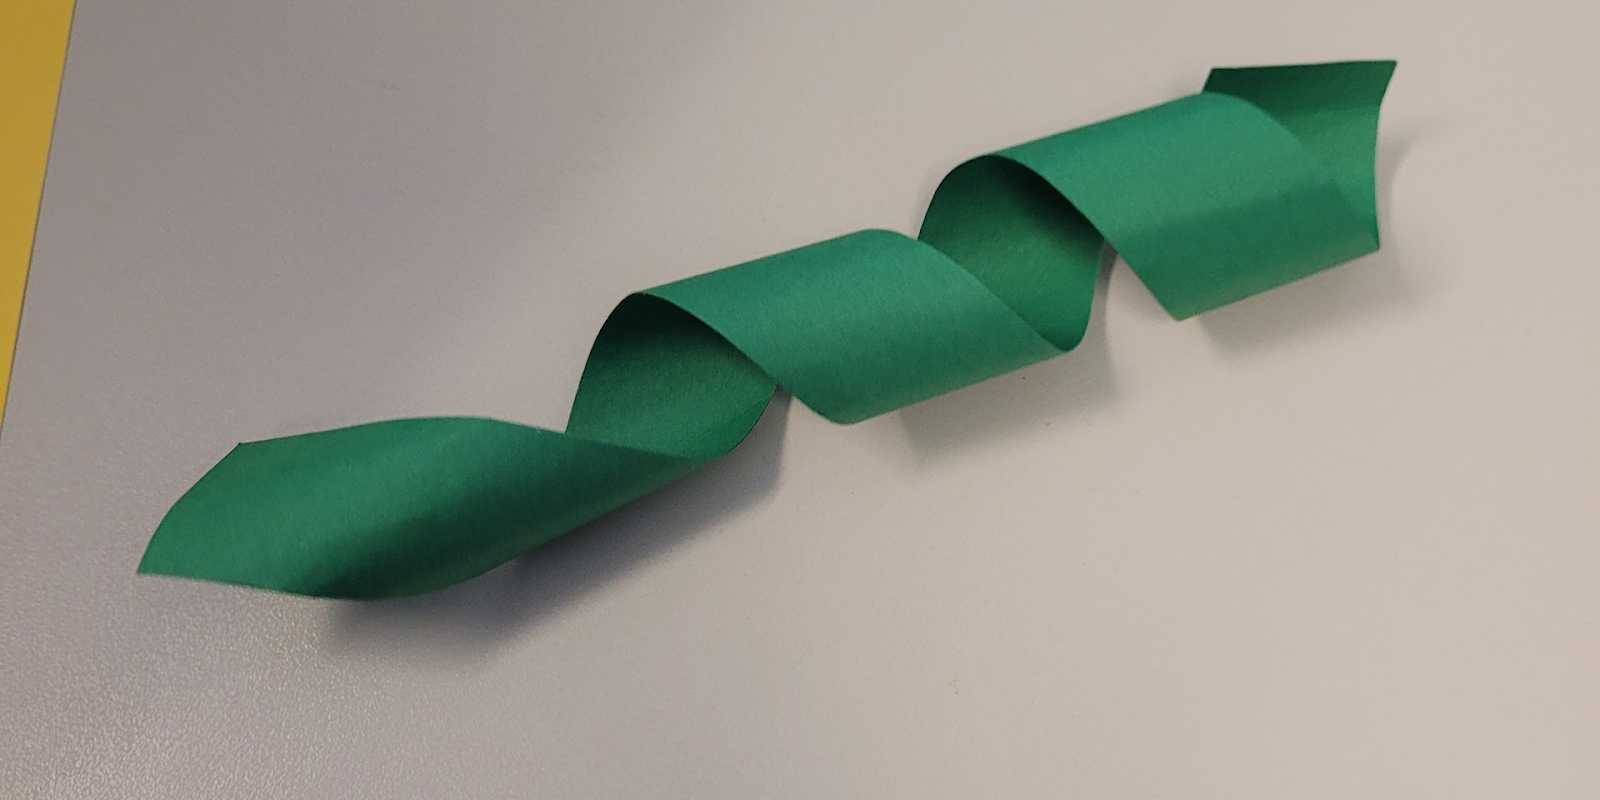
2. You don’t have to roll the paper in a straight line! Roll it at an angle to create a long curl, like this:
3. Instead of curling, you can also fold the paper. This fold reminds me of a paper fan.

Finally, the most important step is how you arrange the paper for your sculpture. Look at Gillespie’s work for inspiration! Some pieces are arranged in rows while in others the metal is intertwined.


What kind of movement do you want to create? Arrange your sculpture multiple ways before taping the pieces down to ensure you get the most movement:


My goal was to create a paper sculpture that could be viewed differently from multiple angles. How do you want your piece to be viewed? TIP: Some pieces I didn’t even roll or fold, I twisted and turned the paper between other sections and taped the piece to it. Even though I was inspired by Gillespie’s curls, this sculpture doesn’t copy her work exactly. Without using many designs, and weaving pieces that don’t originate from a single point, I created a sculpture of my own; I would compare its movement to a rollercoaster. How would you describe your sculpture?
