

Alyssa Dumire, Director of Children’s Education
Spring is in full bloom here in northeast Indiana! It seems like I can look in any direction and see something flowering. It’s also the perfect weather to have your windows open, but those pesky spring breezes can wreak havoc on a neatly organized desk. Enter: The paperweight! And not just any paperweight, but one that brings those spring blooms indoors, like this one (below) by Paul Stankard.


Paul Stankard’s work represents the overlap between fine art and craft, and art and science. He was a poor student, but always loved making things and was in search of a trade to pursue after high school. When he brought home a trade school brochure, his father, a chemist, noticed the scientific glassblowing program at Salem County Vocational Technical Institute (now Salem Community College) and encouraged Paul to enroll. During his ten year scientific glassblowing career, Paul became a master of fabricating complex instruments, but he wanted to be creative. He began sculpting small animal figures, but when he made a flower, something clicked. It reminded him of his childhood spent outdoors in New Jersey, exploring nature and picking flowers.
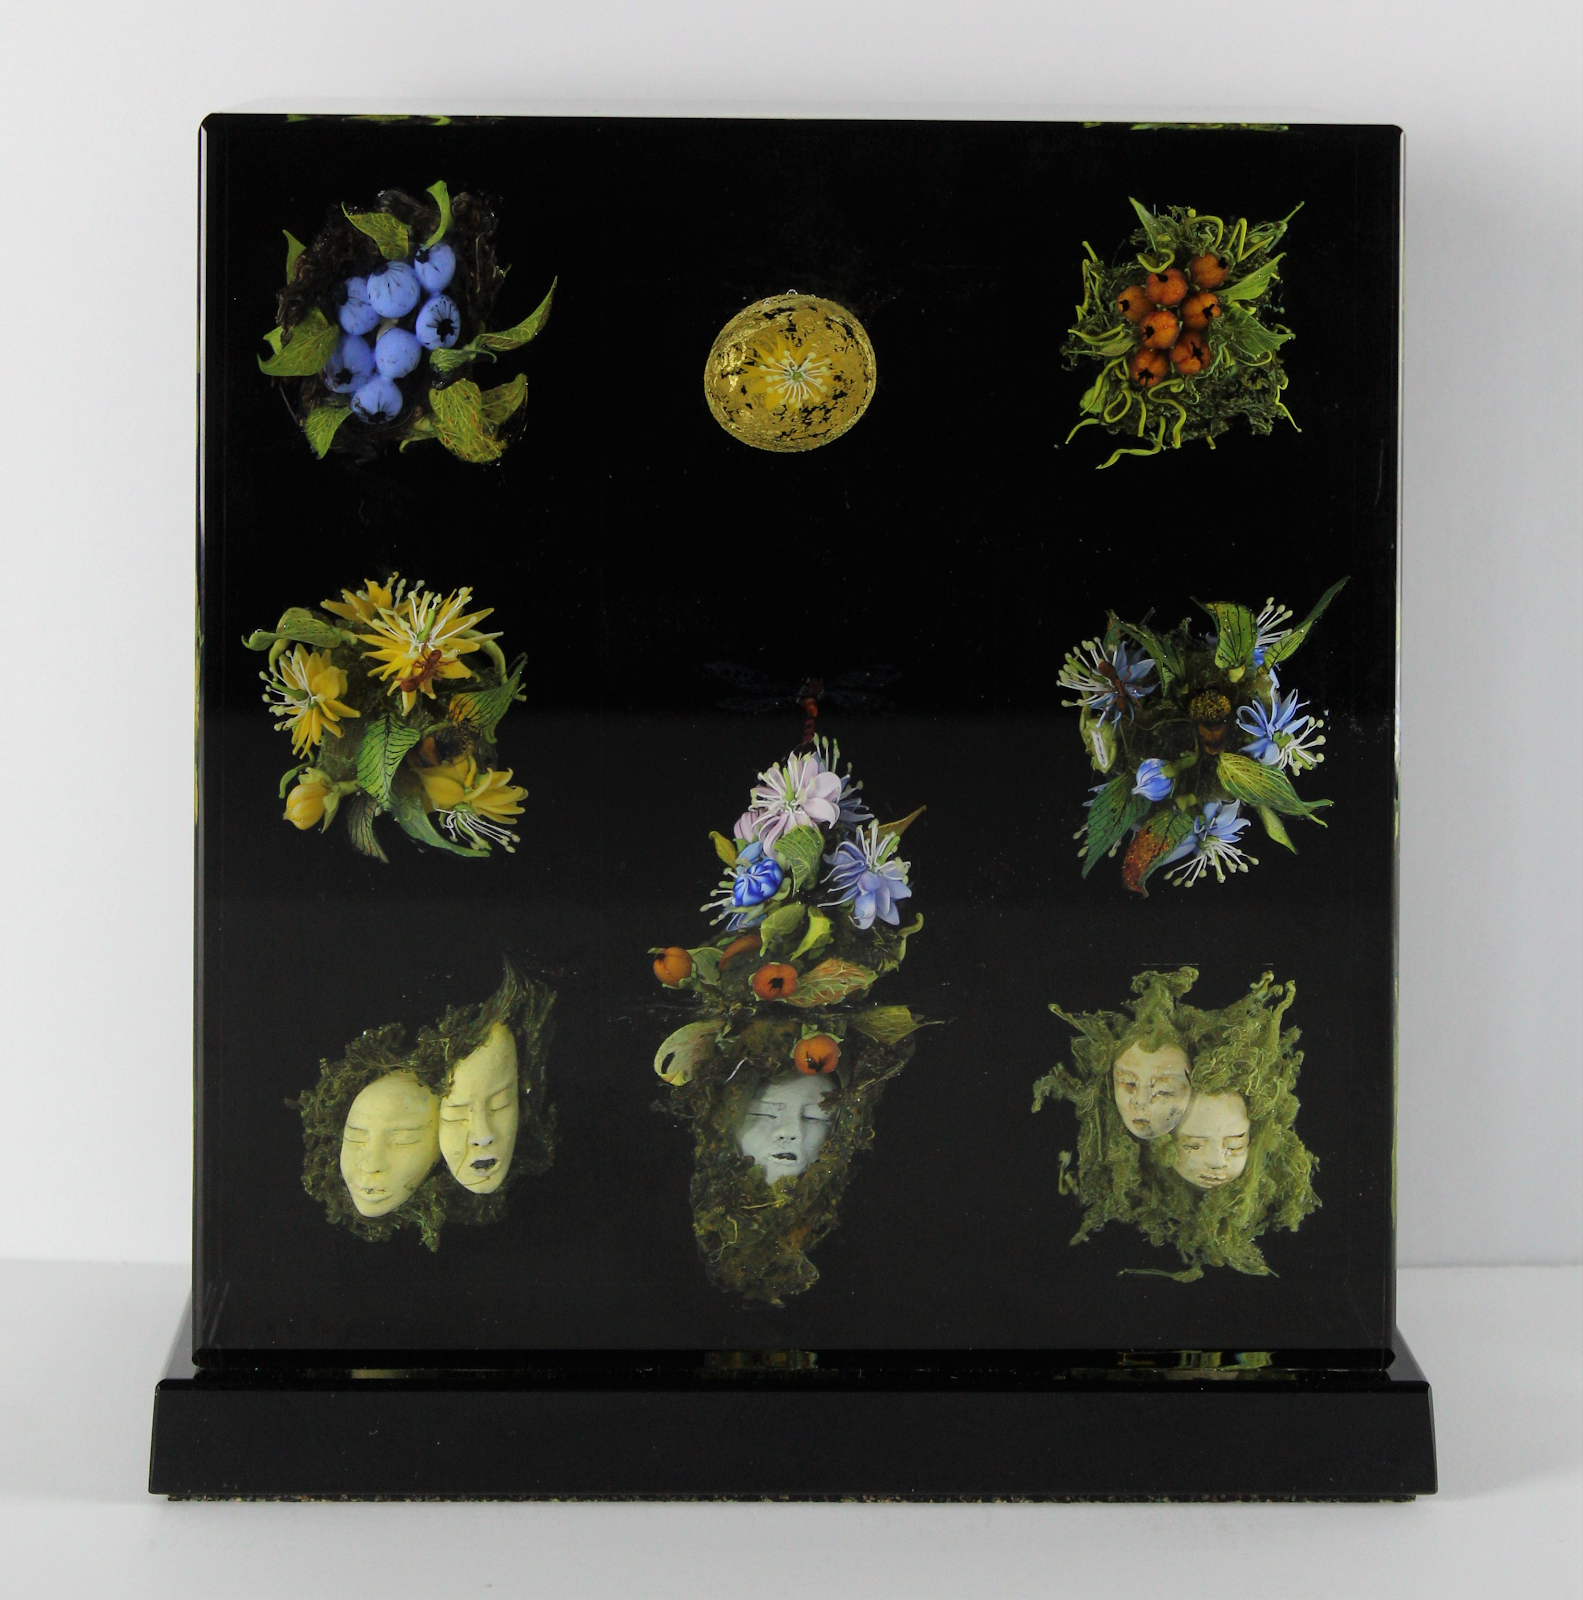
Stankard is now known as the master of the paperweight, a form which he is largely credited with transforming from craft to fine art. His intricately detailed, nature-inspired orbs show a keen eye for scientific detail. They look like real flowers and leaves suspended in glass, but if you know anything about glass, you know it has to be very hot to be shaped, too hot for delicate flora to survive; instead, these are all hand-sculpted. Finely detailed glass sculpture like this is often flameworked (also known as torchwork or lampwork), using thin cane that is heated by a stationary blowtorch. Stankard says what I tend to tell my tour groups when we get too bogged down in the technical aspects of how a work was made: “glass is magical”, and it really is! FWMoA owns two works by him, one a traditional paperweight and another, more sculptural piece, with multiple floral arrangements and masks surrounded by textured moss. Even with a basic understanding of the flameworking process, and after watching videos of Stankard working, they still look like magic to me!

Inspired by Paul Stankard’s realistic blooms and leaves captured in clear glass, we’re going to collect some actual flowers to capture in a springy suncatcher, so we can observe and enjoy their beauty for months to come.
Here’s what you’ll need:
- A variety of flowers and leaves
- Scrap printer paper
- Heavy books and/or an iron
- Black construction paper
- Scissors
- Pencil
- Clear contact paper
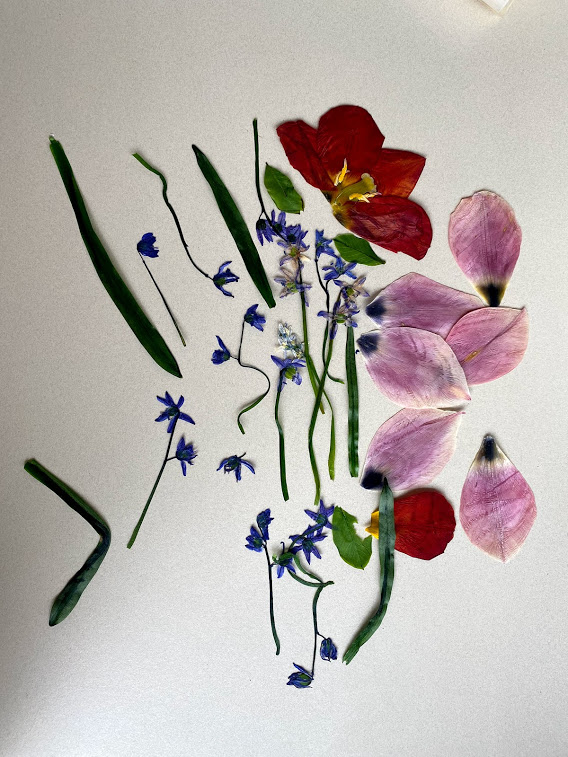
First, take a walk! Collect a variety of colors and sizes of flowers and leaves. I chose a couple tulips and a lot of small blue flowers, as well as a few leaves (I tried a magnolia that you see in the picture, but it turned brown so I don’t recommend it).
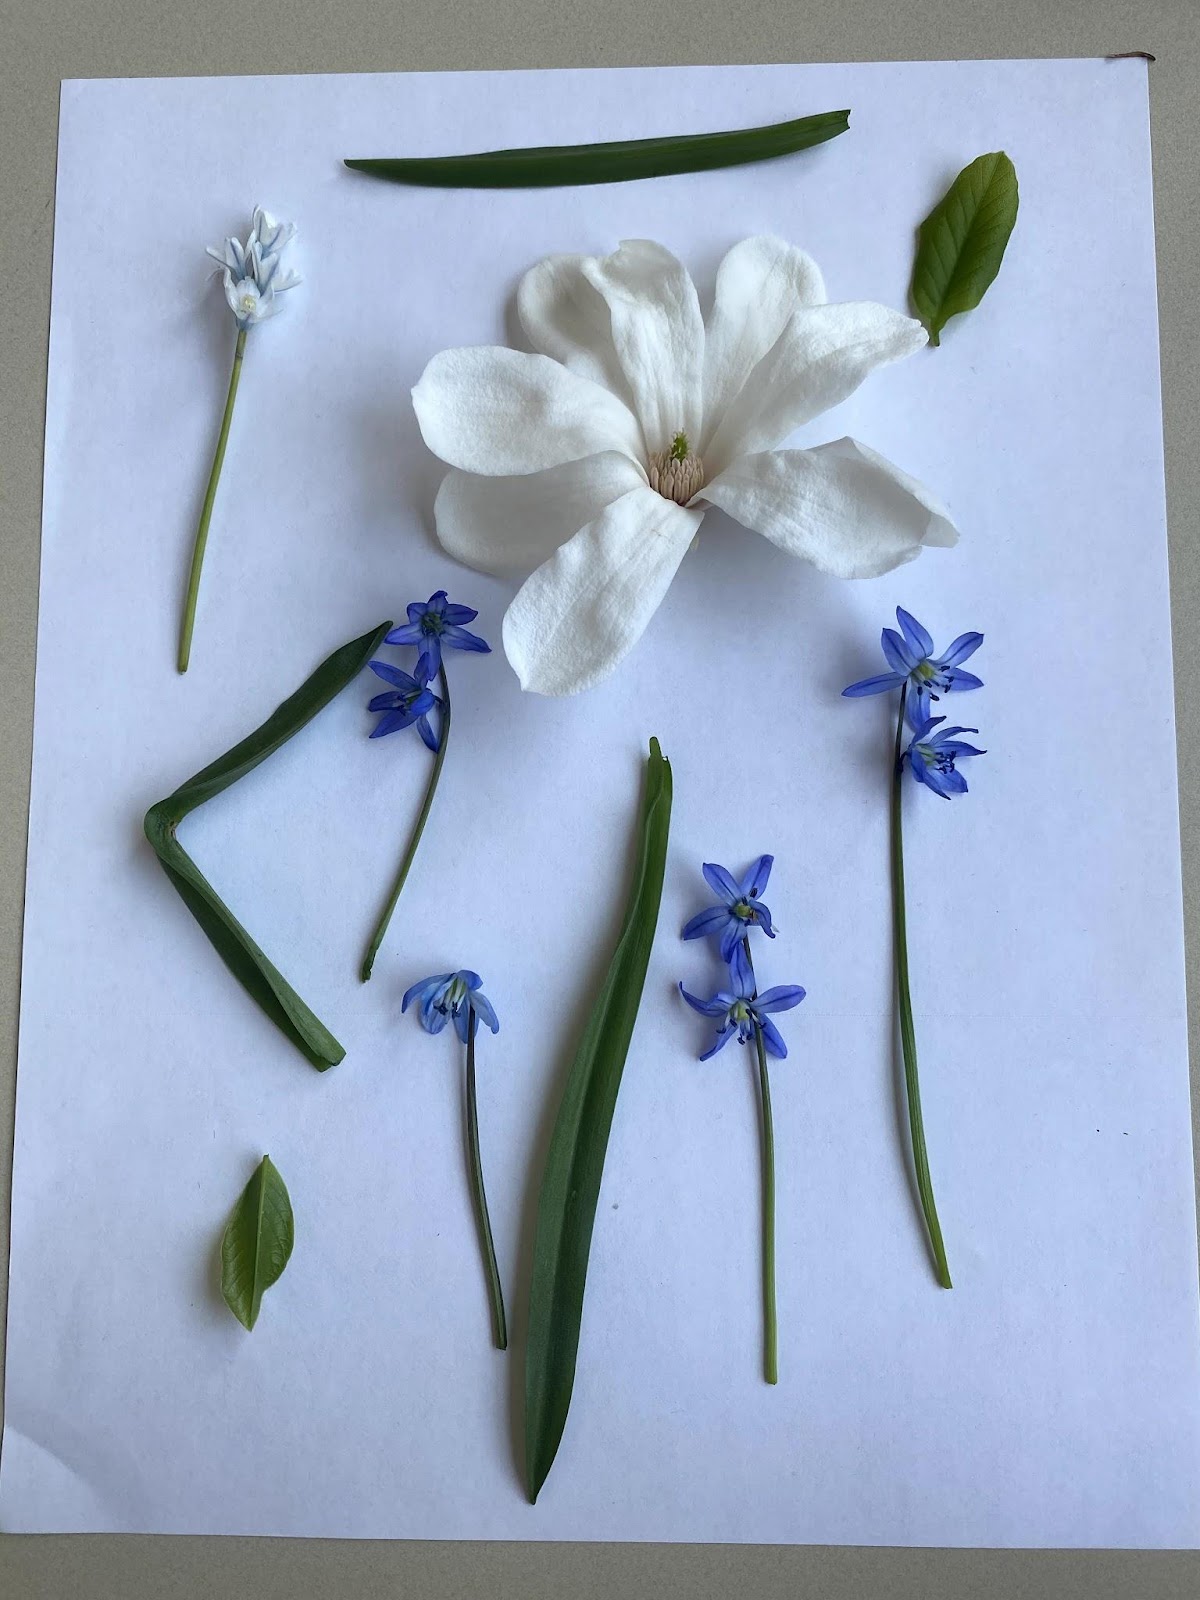
Press and dry your flowers: Sandwich them between a couple sheets of smooth scrap paper, leaving the blooms whole or pulling off individual petals. It may be tempting to use something absorbent like paper towels, but any texture on the paper will transfer to your flowers! Press gently with your hands to start to flatten the flowers, then stick the sandwich in the pages of a heavy book (the pages will wrinkle from the moisture so don’t use a book that is too precious), under a stack of books, or in an actual flower press if you have one! Leave them to dry for a week or so. You can check the paper and switch it out if it’s getting too wrinkled and damp. Alternatively: you can use an iron to speed up the process! Set it on the lowest temperature so the flowers don’t burn and turn brown, and keep them sandwiched between the layers of paper. Press with the iron for 15 seconds at a time, letting the flowers cool before pressing again until they’re dry.
When dry, the flowers will be stiff, slightly translucent, and should release from the paper easily (they are still very delicate though!).


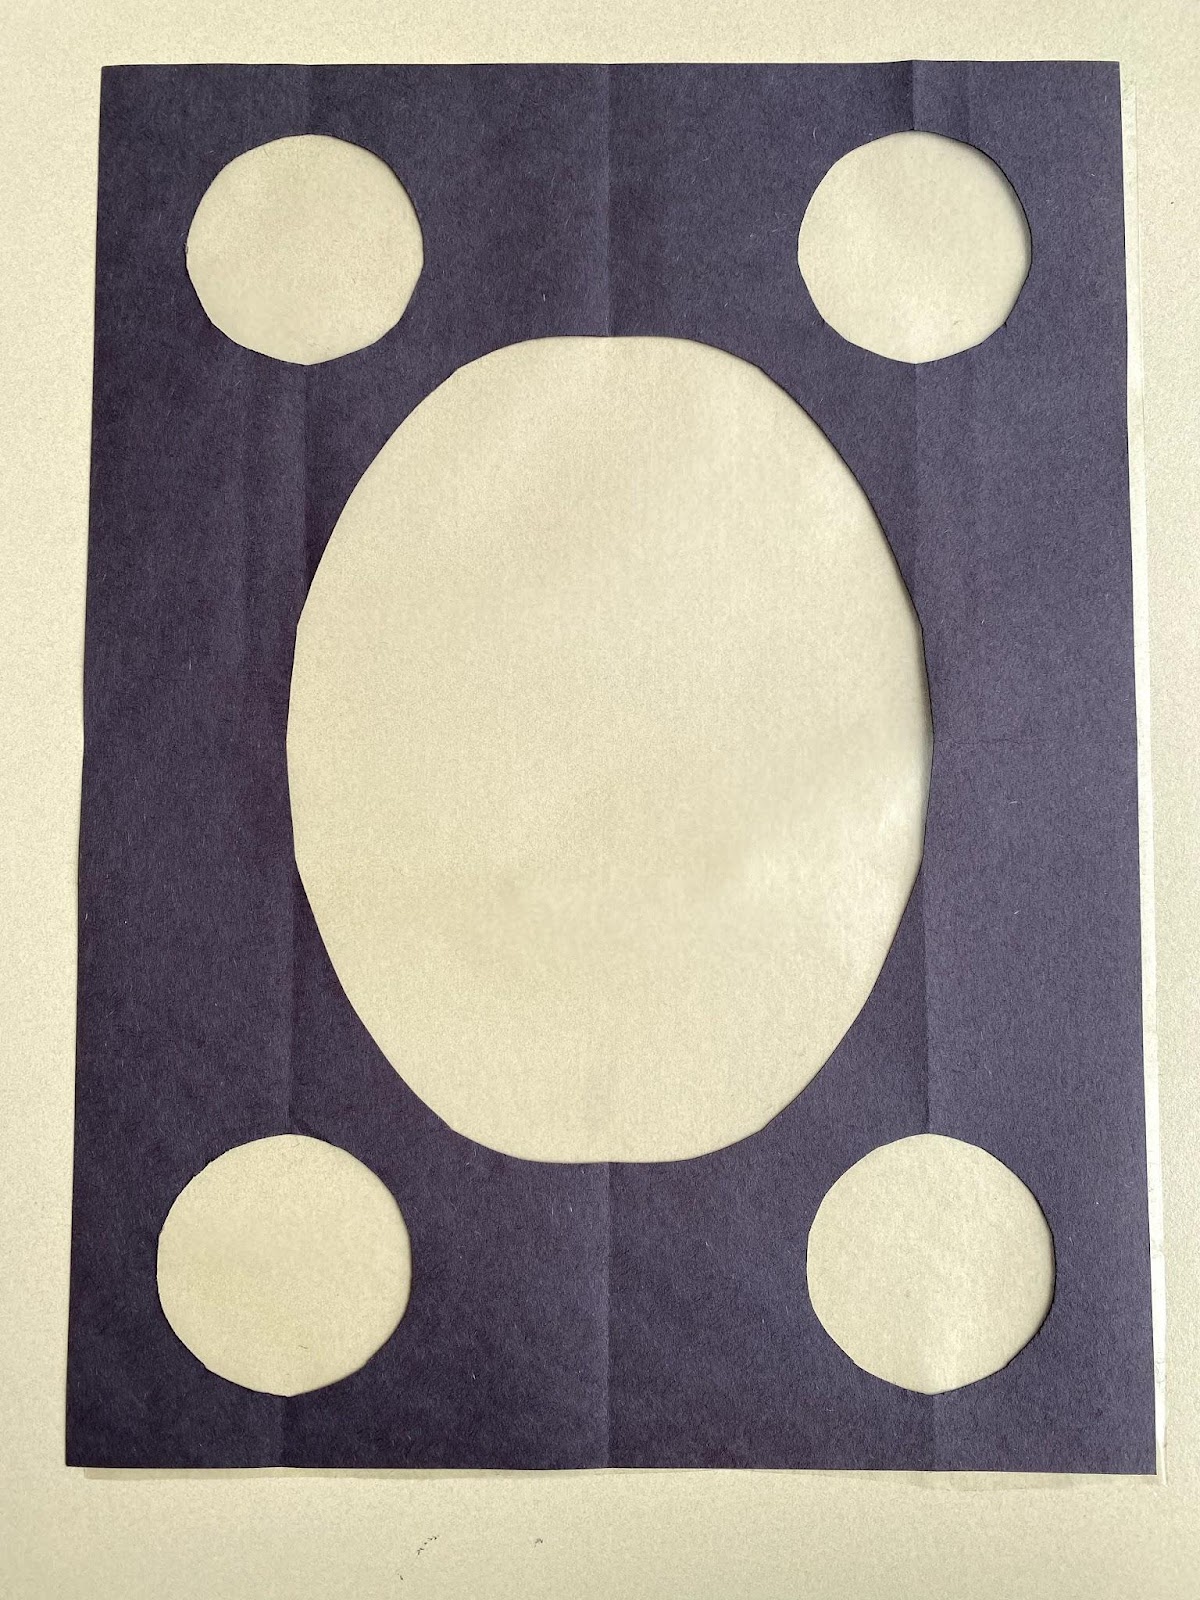
Make the frame for your suncatcher: fold the sheet of black construction paper in half, then in half again the other direction. Draw a quarter of your desired shape on the fold (I chose an oval), then cut it out. Unfold the paper.
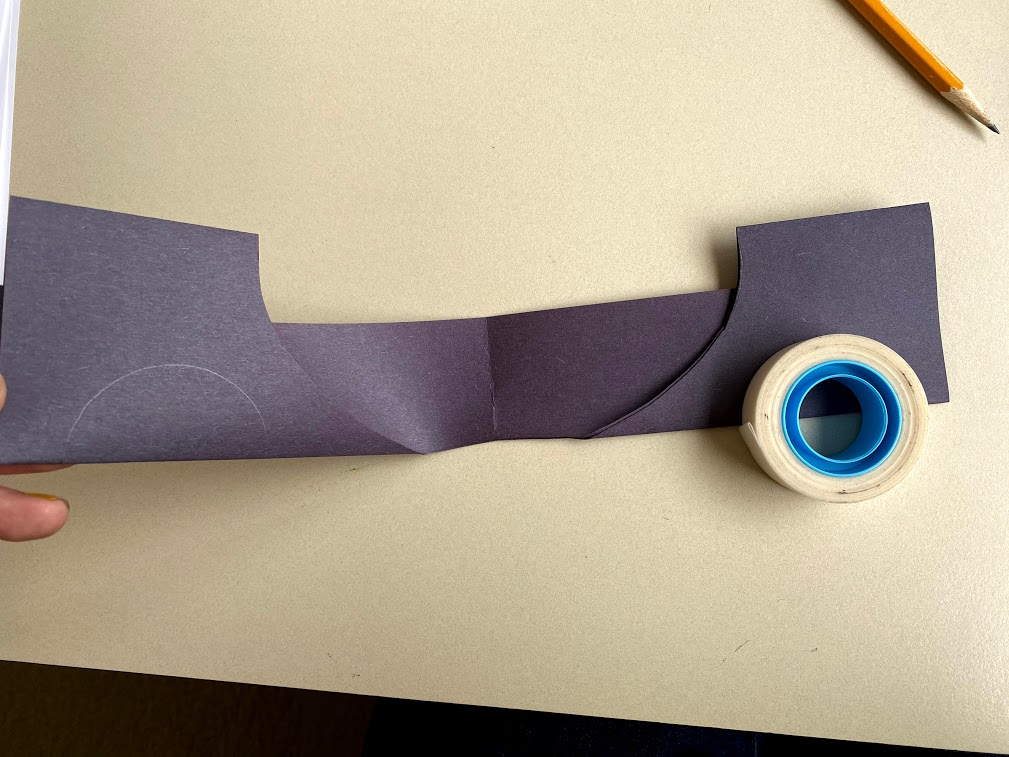
You can continue with one opening in your frame, or if you want to add some other shapes, re-fold the paper in half once, then again. I wanted circles in the corners so I traced half a roll of tape and cut out.


Design your suncatcher: place the frame on your surface and begin to lay out your flowers and petals, moving them around until you’re happy with the design.
Cut two pieces of contact paper as large as (or slightly larger than) your frame paper. Peel the backing off one and lay it on your surface, then carefully lift your frame away from the flowers (leave the flowers in place so you know where they should go!) and center it on the sticky side of the contact paper.


Move your flowers into place on the sticky paper, pressing to adhere. Now, peel the backing from the other sheet of contact paper and use it to sandwich the flowers and frame in place. Use your fingers to press firmly around the edges of each flower to eliminate air bubbles. Trim any overhanging contact paper from the edges.
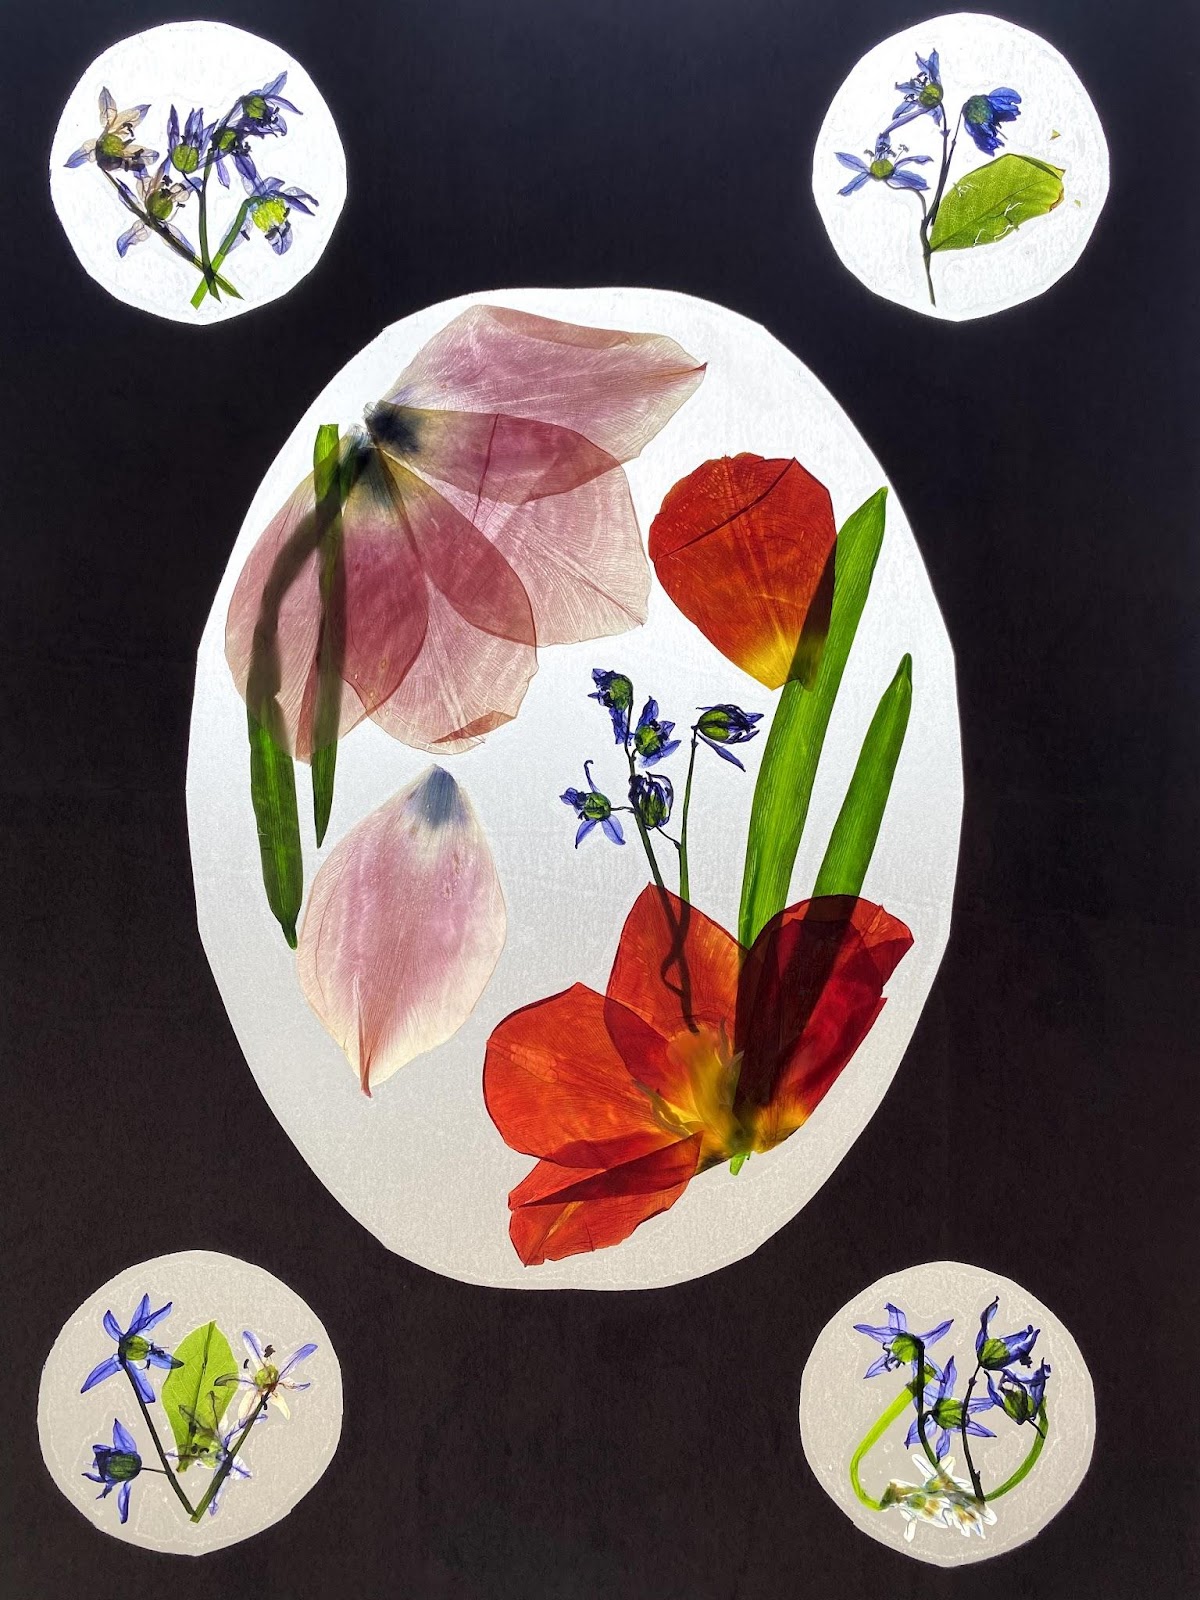
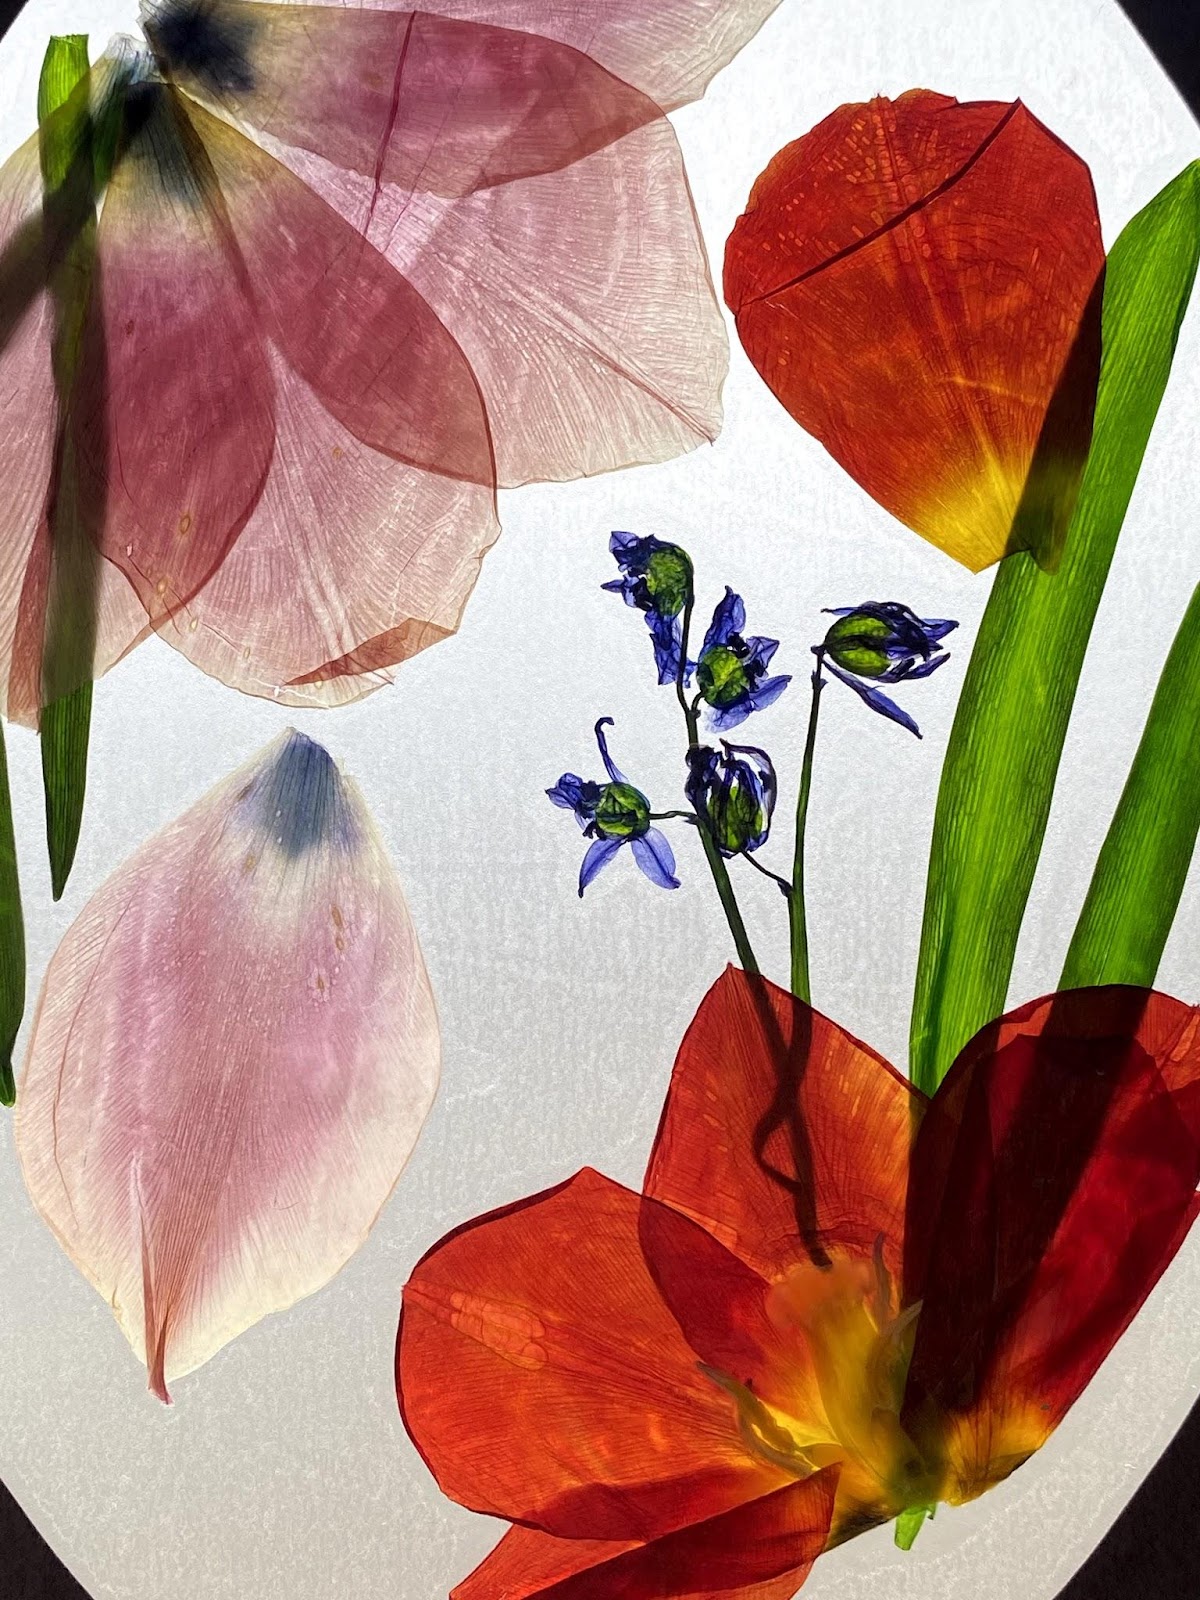
Hang it in your window and enjoy! Even on a cloudy day, the light shines through the petals, emphasizing the fine details that we otherwise may not notice.
Share your suncatcher here on the blog or on our other social media: Facebook, Instagram, & Twitter.
Good