

Naomi Vanderleest, Education Assistant
Learning about how an artist makes their work can inspire us to try new methods for creating our own art. Today, I am looking at artists that use grids. Why do artists use grids? Let’s look at some works on display at the Fort Wayne Museum of Art to find the answer. Why do you think there is a grid in this work?

This is a study for a much larger work; the grid was used to plan the scale! In 1901, Charles Holloway was planning 4 murals to be installed at the Allen County Courthouse. This study is about 4.5 feet long and 2.5 feet tall but each mural is 45 feet long and 25 feet tall; without the grid, this study is useless. With the grid, the painting can be broken down into squares that are replicated on a larger surface. You may have seen this technique at FWMoA’s Chalk Walk event, during Three Rivers Festival! I found another grid in the museum. Can you find it in this picture?

See anything? Chuck Close (far right) was known for his use of grids in portraiture, even when creating this print at Landfall Press he used this method. Let’s take a closer look!

Do you see it now? I do! There is a faint white outline in each square. Chuck Close used a grid to an extreme: every mark is reduced to dots and lines that fit into small squares that result in a highly detailed portrait. Overall, grids become guides for artists to create drawings on any scale, with as much detail as possible. Learning about grids inspired me to use my own. Like Close, I will be creating a portrait today. Create your own grid drawing using these materials:
- Pencil
- Eraser
- Drawing Paper
- Ruler
- Photograph printed on copy paper
First, take or find a photograph that you want to draw. To practice enlarging artwork like Holloway print it smaller. I printed the photograph 4 inches by 5 inches. TIP: Make sure your photograph can be divided equally, or some of your picture might be left out when creating the grid.
Next, create a grid over the photograph. TIP: For an easier option, create the grid on your computer by placing a table over your photograph. You can also print out a grid to draw on. To divide my photograph evenly I marked it at a half inch on every side. Line up the sides to create perfectly straight lines. Letter and number the grid to keep track of your drawing later.

Next, make another grid but on the drawing paper. I doubled the size of my picture by doubling my measurements; doubling my 4 inch by 5 inch photograph will create an 8 inch by 10 inch drawing. To create this grid I made a mark on every inch of my ruler until it measured 8 inches by 10 inches on both sides. To complete the grid I lettered and numbered it the exact same way as my photograph, creating a key while working square by square.

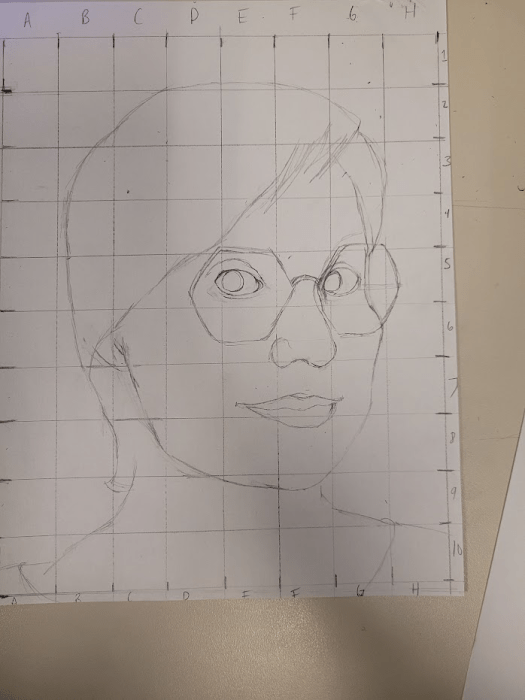
Now I can create! Using my photograph I can focus on one square at a time. I started by making the general outline of my face before placing the features.

Next, I placed my facial features (and glasses)!
To finish, I added details and cleaned up my lines.

Does it look like my photograph? I think so, but it’s definitely not as detailed as Chuck Close’s portraits. I could erase my grid lines, but I enjoy seeing the drawing emerge from the sketch. Show your photograph and drawing to a friend and ask them if it looks like the picture. Inspire them to create their own grid drawings!
Sign up for a Second Saturday Family tour at FWMoA today to see if you can find more grids on display at the museum.