

Alyssa Dumire, Director of Children’s Education
With Thanksgiving already behind us, we’re knee-deep in the holiday season, and if your family is like mine, that also means holiday baking. This year in particular has seen a huge surge in the popularity of home baking, marked by shortages of yeast and flour on supermarket shelves in the early days of the pandemic. That means that even if you rarely turned your oven on before, you might find yourself partaking in new holiday traditions, like whipping up batches of cookies or even elaborate gingerbread houses! It is these miniature architectural marvels that we turn our attention to today.
When considering how we could make a museum-worthy work of gingerbread art, I came to a (perhaps obvious) realization: unless you’re very ambitious, your gingerbread house is a model, or scaled-down version of a real house. Many people enjoy building models as a hobby–model airplanes and boats come to mind, or models using Legos. Architects and designers use them to test out or demonstrate their ideas.

Artists too, particularly sculptors, build models of their work, more often known as “maquettes”. In this case, the model is more of a 3-dimensional sketch. Maquettes are particularly important when the artist is planning a large-scale work of public art, like sculptor Dale Enochs. You can see the maquettes for his work, some completed others not, on view at FWMoA through March 14 in Static Energy. Although we can’t fit his large-scale sculptures in the museum (or move them from their locations), the maquettes allow us to imagine what it would be like to experience them, especially when they include small human figures to give us a sense of scale (as seen in the photo above).


There are, of course, finished public sculptures all around the Arts Campus surrounding the museum. What makes an effective work of public art? If you’ve ever walked around Mark di Suvero’s Helmholtz or David Black’s Crossings, you’ve occupied their negative space, the space around and between the physical sculpture. It’s this space that impacts how we experience and interact with the sculpture. The shapes of the negative space also frame the surrounding environment in new and interesting ways, even if we’re just looking at a photograph! The surface and color of the sculpture is not to be forgotten–why do you think di Suvero chose the bright red-orange, or Black the stark white? How would the sculptures change if they had added more texture to the smooth surfaces of the metal?
With inspiration from Enochs and the public sculpture around FWMoA, we’re taking the studio back to the kitchen to make our own works of gingerbread sculpture. You can think of your work as a finished, tabletop sculpture, or imagine it as a maquette for a massive work of public art. It can take any form you like, but I’m sharing my process and some general construction tips below.
Supplies:
- Paper and/or cardboard
- Scissors
- Pencil
- Ruler
- Gingerbread dough (I used this recipe
- Royal icing (I used this recipe) and a piping bag (or just a plastic baggie)
- Any sprinkles, candies, coconut, or other (edible!) decorations you like
First, make your template!

If you want to fully plan your construction ahead of time, you can completely build it out of cardboard first, taping the pieces together, then cut it apart to use as a pattern for cutting out your gingerbread. I took a more improvisational approach, creating pattern pieces that mimic building blocks in basic shapes. Make sure to use the same dimensions for your shapes! I worked in multiples of 2 inches to help the pieces fit together well.
Make the dough.


I like the recipe linked above because it doesn’t make a huge batch, just one cookie sheet worth at a time, and it’s easy to mix up (it says to use a stand mixer, but you can absolutely do it by hand if you don’t have one). I baked two batches to make sure I had enough pieces (but had some left over).

Roll the dough out onto a sheet of parchment paper the size of your baking sheet, then lay out your template pieces, lining them up next to each other as much as possible. Carefully cut around them with a paring knife or pizza cutter, but don’t pull them apart! Keeping all the dough intact will make sure the edges stay straight as they bake.
You can also use a cookie cutter to cut out shapes (I cut some circles), and I do recommend pulling these out of the larger shape before baking, because they were very difficult to remove afterwards.

Bake until brown. See how it all merged back together? While your cookie is still hot, very carefully re-cut the lines with your knife or pizza wheel. It will be soft when it comes out of the oven but will start to harden quickly! Let them cool completely, then it’s time to decorate!
Make the icing.
Either fill a piping bag or plastic baggie with icing (you can use a small round tip if you have it or just snip a hole in the corner), or find a butter knife or spatula to apply it with. If you’re leaving it in a bowl and not using it right away, be sure to cover it up because it will start to dry quickly!
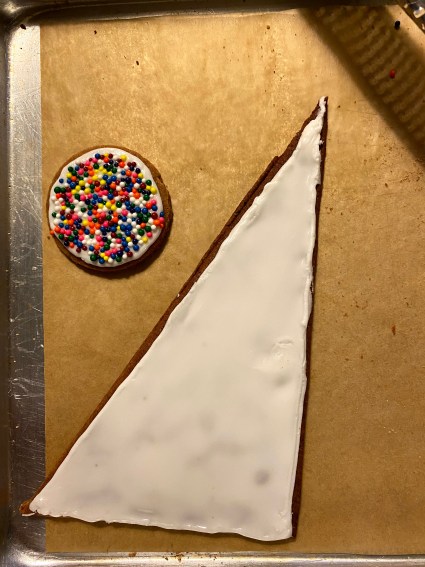
If you want any surface decoration or colors applied to entire pieces, it is best to do this before assembling your structure. The color of the plain gingerbread reminds me of rusty metal, which I like, but I wanted to add some solid white pieces for contrast, and so that the white icing we’ll be using as glue doesn’t look so out of place! Take a little of your thicker icing and thin it with a bit of water to fill in your shapes. Use the thicker icing to pipe around the edges and the thinner to fill it in. I covered one of my circles with sprinkles while the icing was still wet! This will need to dry at least overnight, so plan ahead.
Assemble your sculpture!
First, we need to find or make a base. I’m using a cutting board covered with foil, but a sheet of cardboard, a tray, or a cookie sheet would work too.


Start to test the placement of your components. I held some up together until I found a few groupings I liked, then chose one to start with. Apply icing to the bottom edge of all of the pieces, then along one side of each seam and “glue” them together. An extra set of hands is helpful here! If you need to trim any pieces, use a serrated knife in a gentle sawing motion.
As you add to your sculpture, turn or move to a different side of the base often so you can be sure that it is interesting from all angles. Pay attention to the negative space (the space around and within the sculpture itself). Imagine yourself walking around the full-size version of your sculpture and think about the scale.


Once the structure itself is built, it’s time to add details and decoration! This will make it more believable as a large sculpture. I piped on some icicles to the top edges, and used the icing to stick on some coconut and sparkly sugar to mimic snow. Then, I piled some more coconut on the base. What else could you add? Maybe a small action figure for scale, or some clippings from a plant to become trees! It really doesn’t take very many details to bring your sculpture to life, but you can add as many as you like.


Don’t forget to share your gingerbread creations with us here on the blog or on our social media sites: Facebook, Twitter, Instagram.
One Reply to “”